Disclaimer
Because MyHost doesn’t develop, ship or maintain these mail clients, any issues with them do not fall under our general support. Our Support team cannot help you fix any issues.
General Settings
To set up your email client on your desktop system you can use the general settings below to connect to the server.
Incoming Server mail.yourdomain.co.nz
IMAP Port 993
POP3 Port 995

Outgoing Server mail.yourdomain.co.nz
SMTP Port 465
It is important that you use authentication when using IMAP, POP3 and SMTP.
Username user@yourdomain.co.nz
Password Use the email account's password
Your account’s information will be similar to this:
If you are unsure about these settings, feel free to reach out to our team at support@myhost.nz and include the name of the domain you have your emails with.
Apple Mail
If you need help setting up your client please visit https://support.apple.com/en-nz/102619 or contact Apple support.
Note: This guide uses iOS 15 on an iPhone® SE.
- Tap Settings. Generally, the Settings icon appears in one of your device’s main screens. The Settings menu will appear.
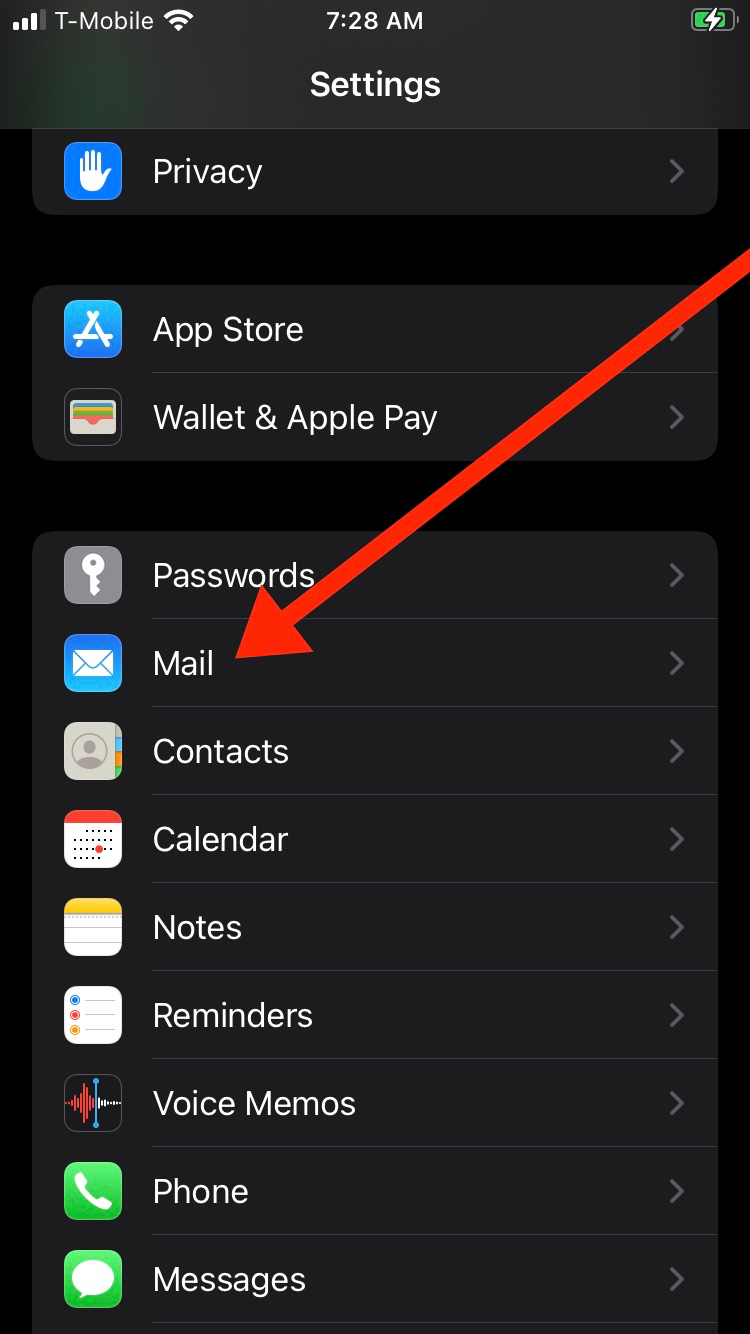
- Tap Mail in the Settings menu. The Mail menu will appear.
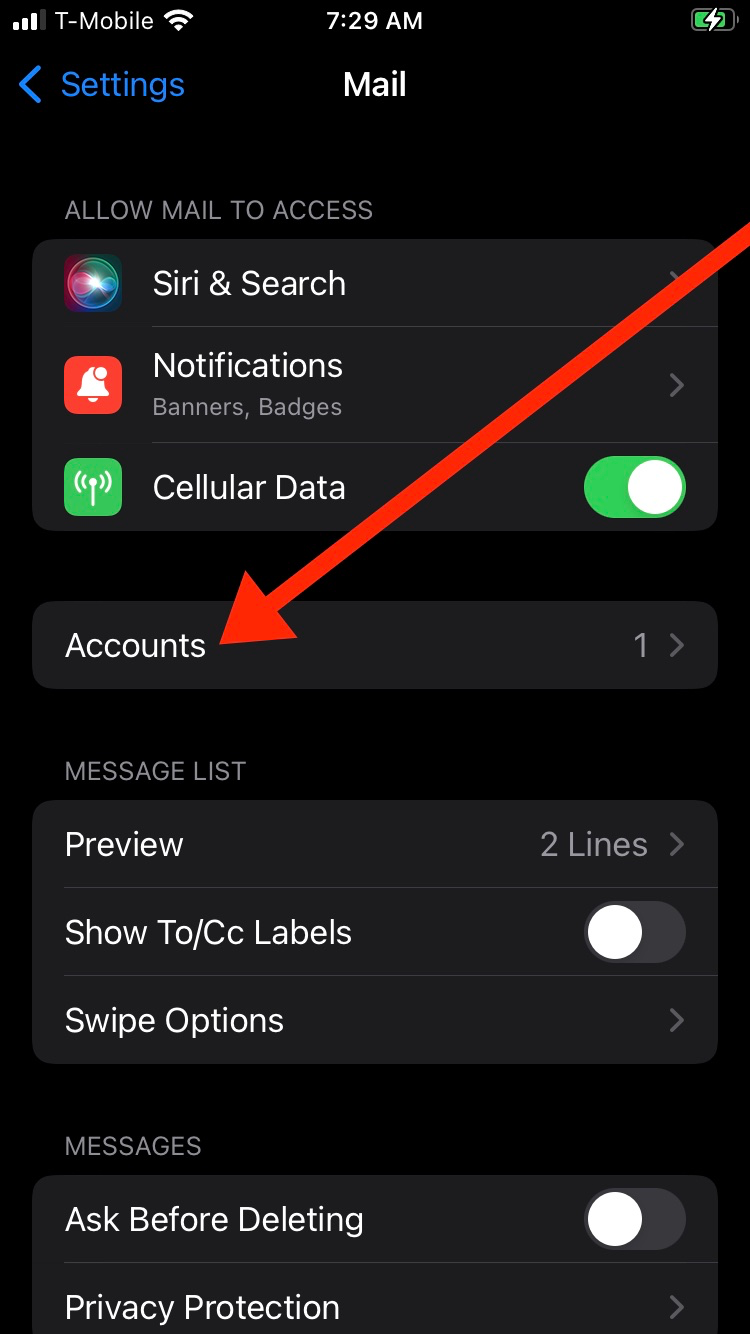
- Tap Accounts in the Mail menu. The Accounts menu will appear.
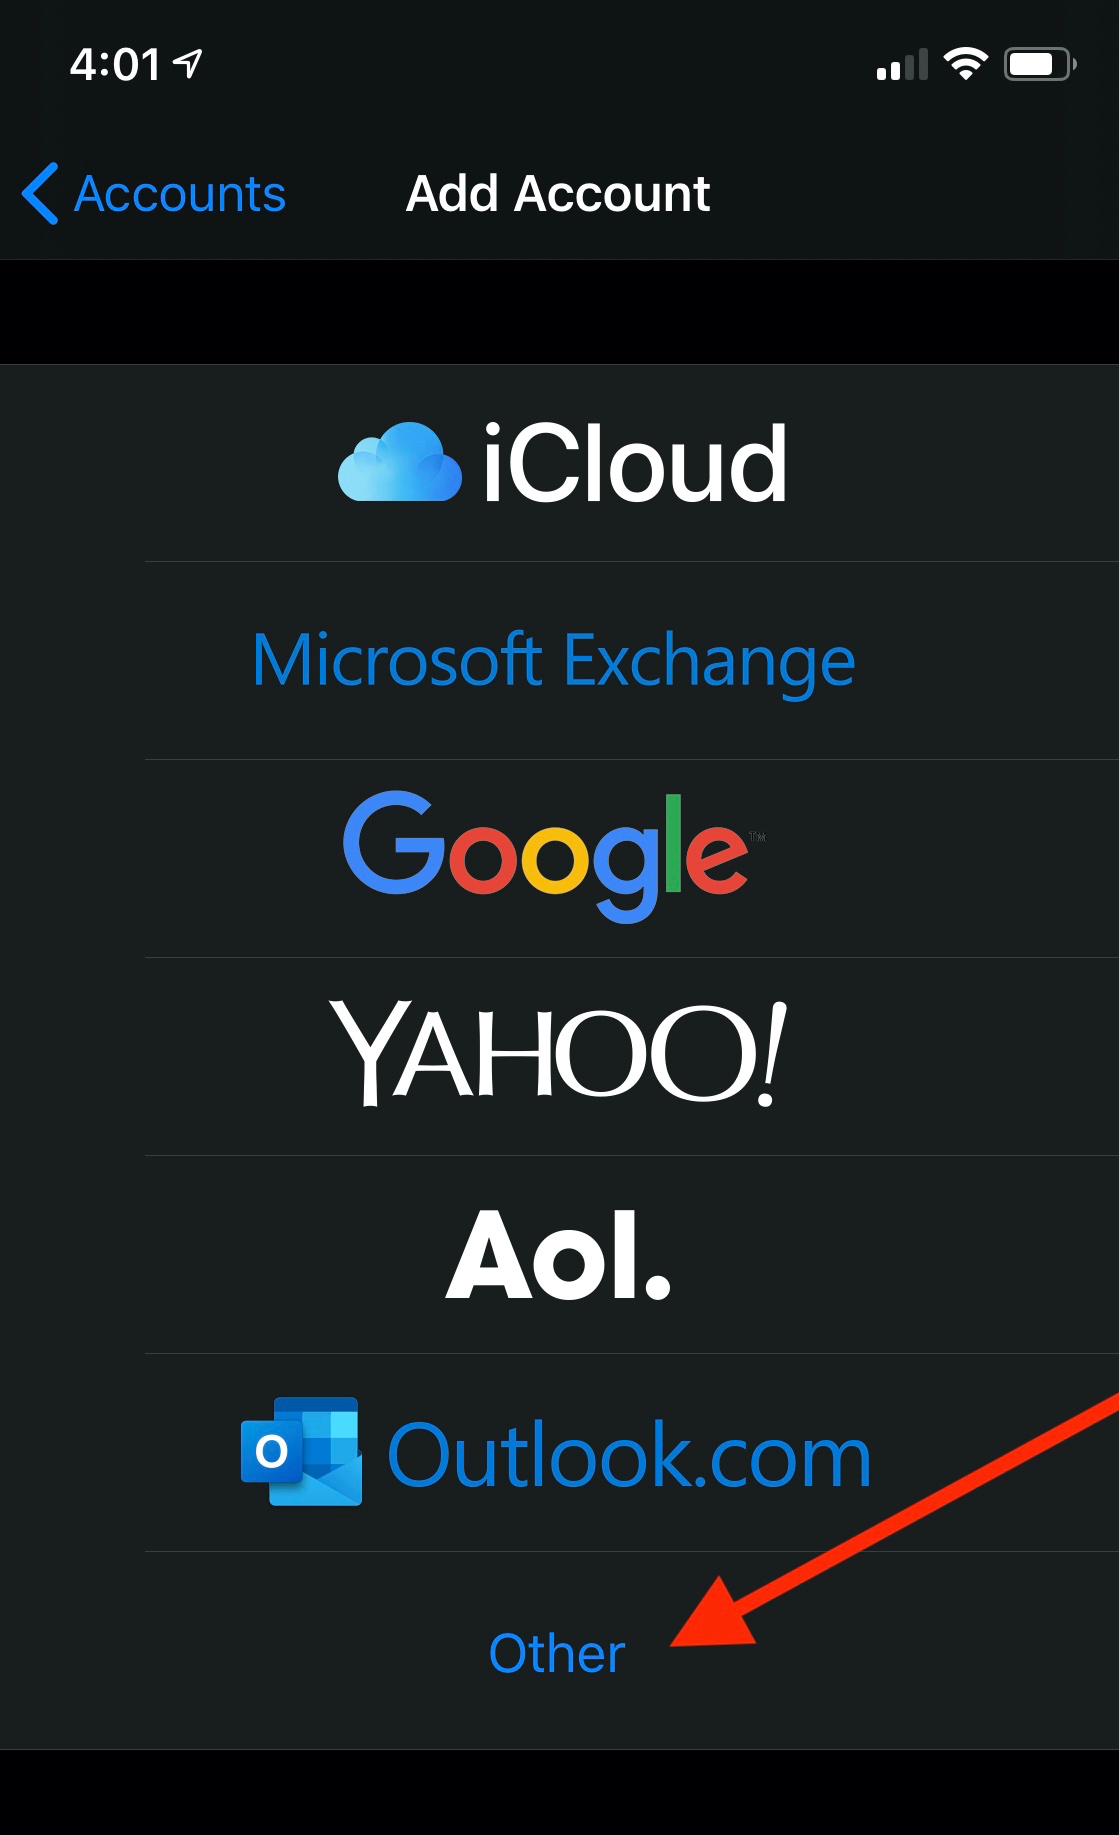
- Tap Add Account in the Accounts menu. The Add Account menu will appear.

- Tap Other in the Add Account menu. The Other menu will appear.
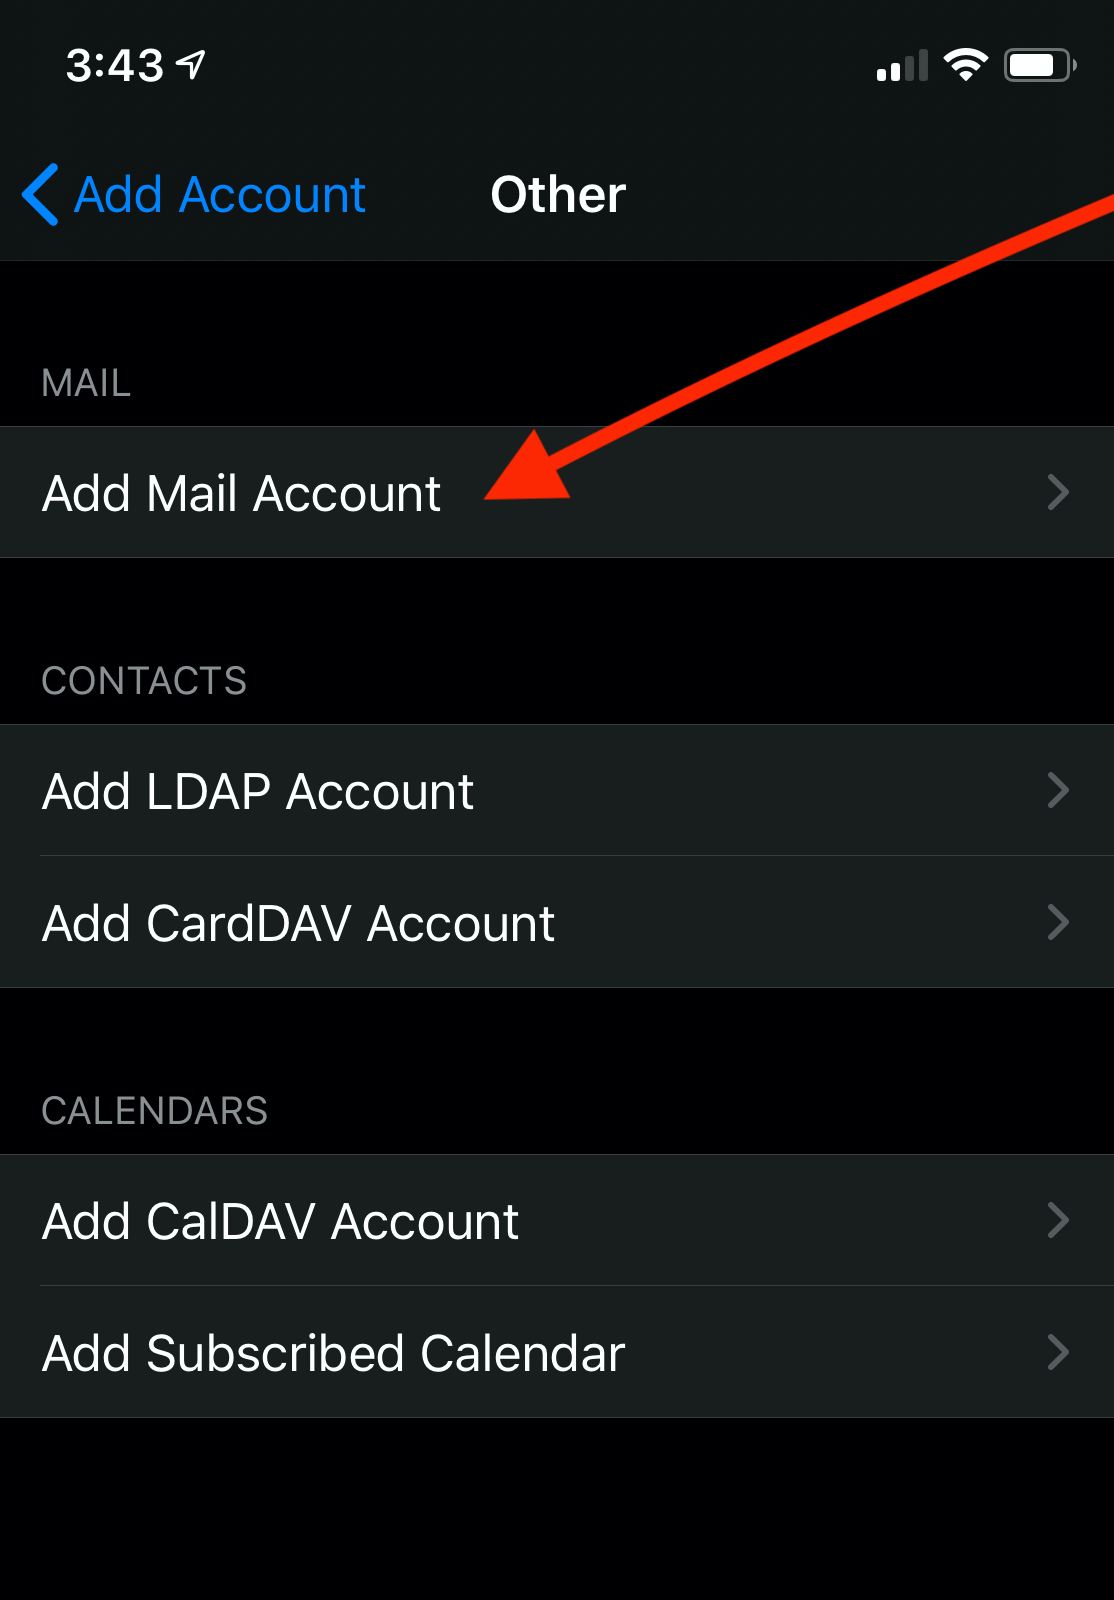
- Tap Add Mail Account in the Other menu. The New Account interface will appear.
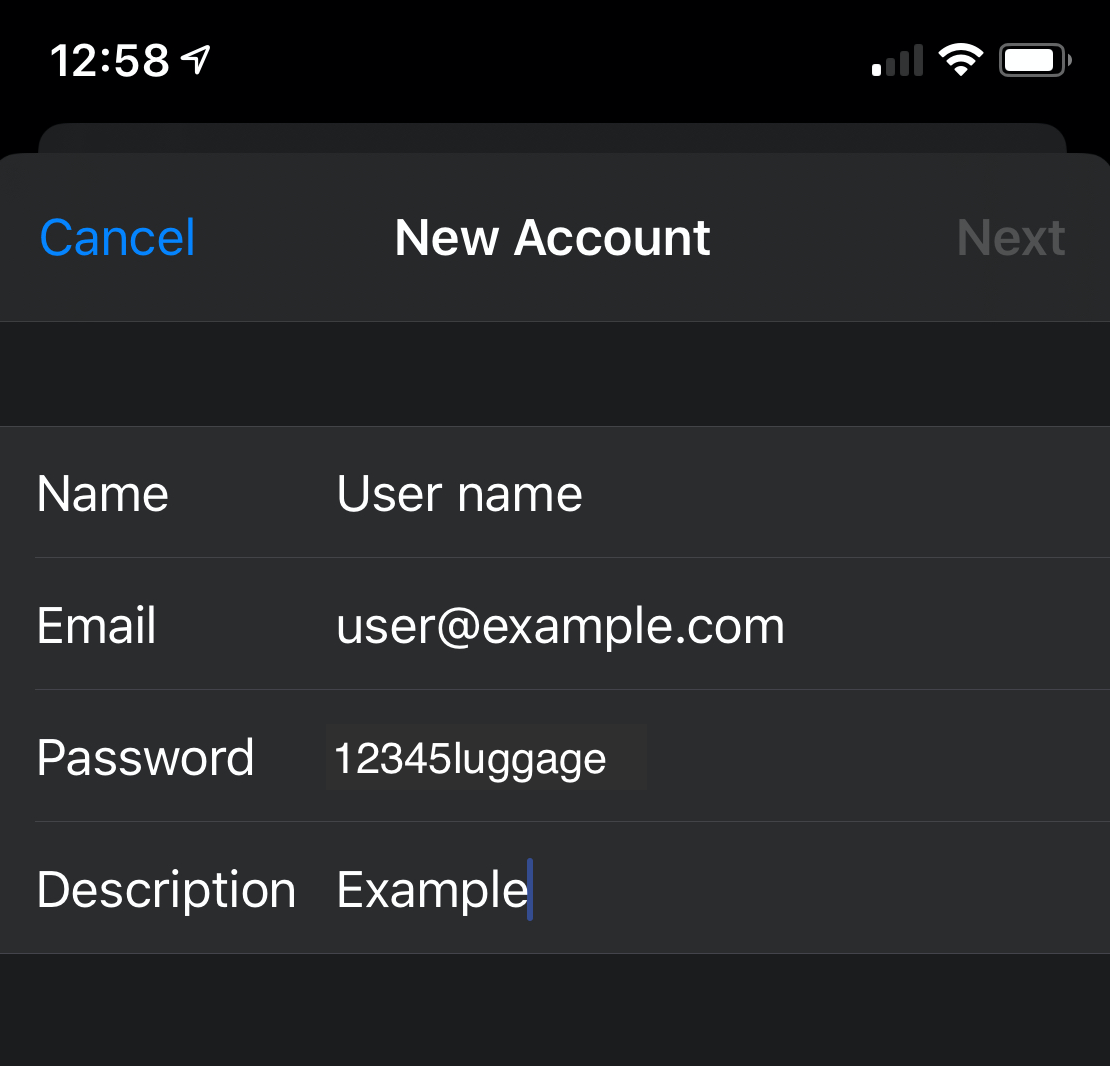
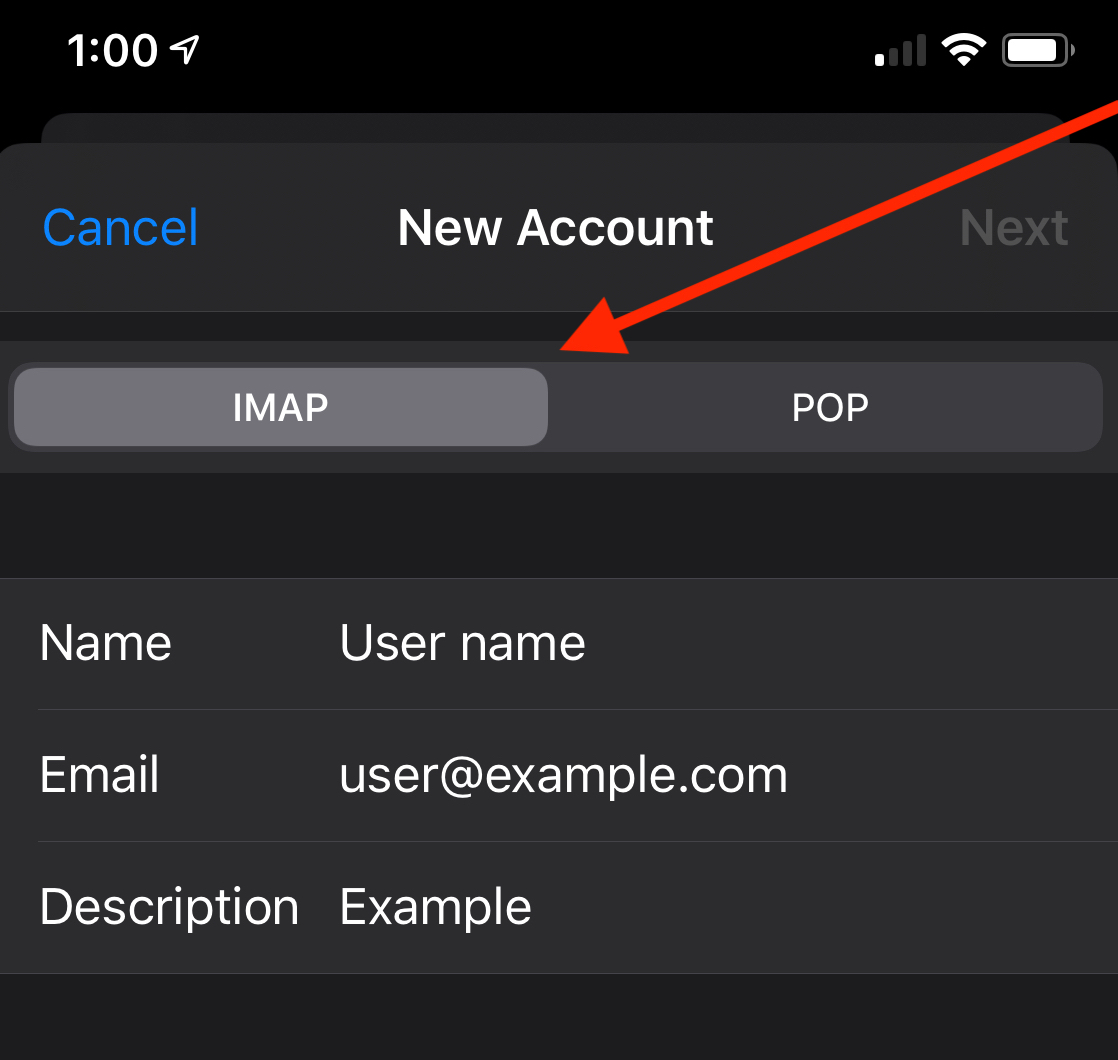
- Enter your account information and tap Next. Enter the following information in the New Account interface’s text boxes:
- In the Name text box, enter the name that you wish to use for the email account.
- In the Email text box, enter your email address.
- In the Password text box, enter the password for the email account.
- In the Description text box, enter a description for the email account.
- Tap Next to proceed to the next screen in the New Account interface.
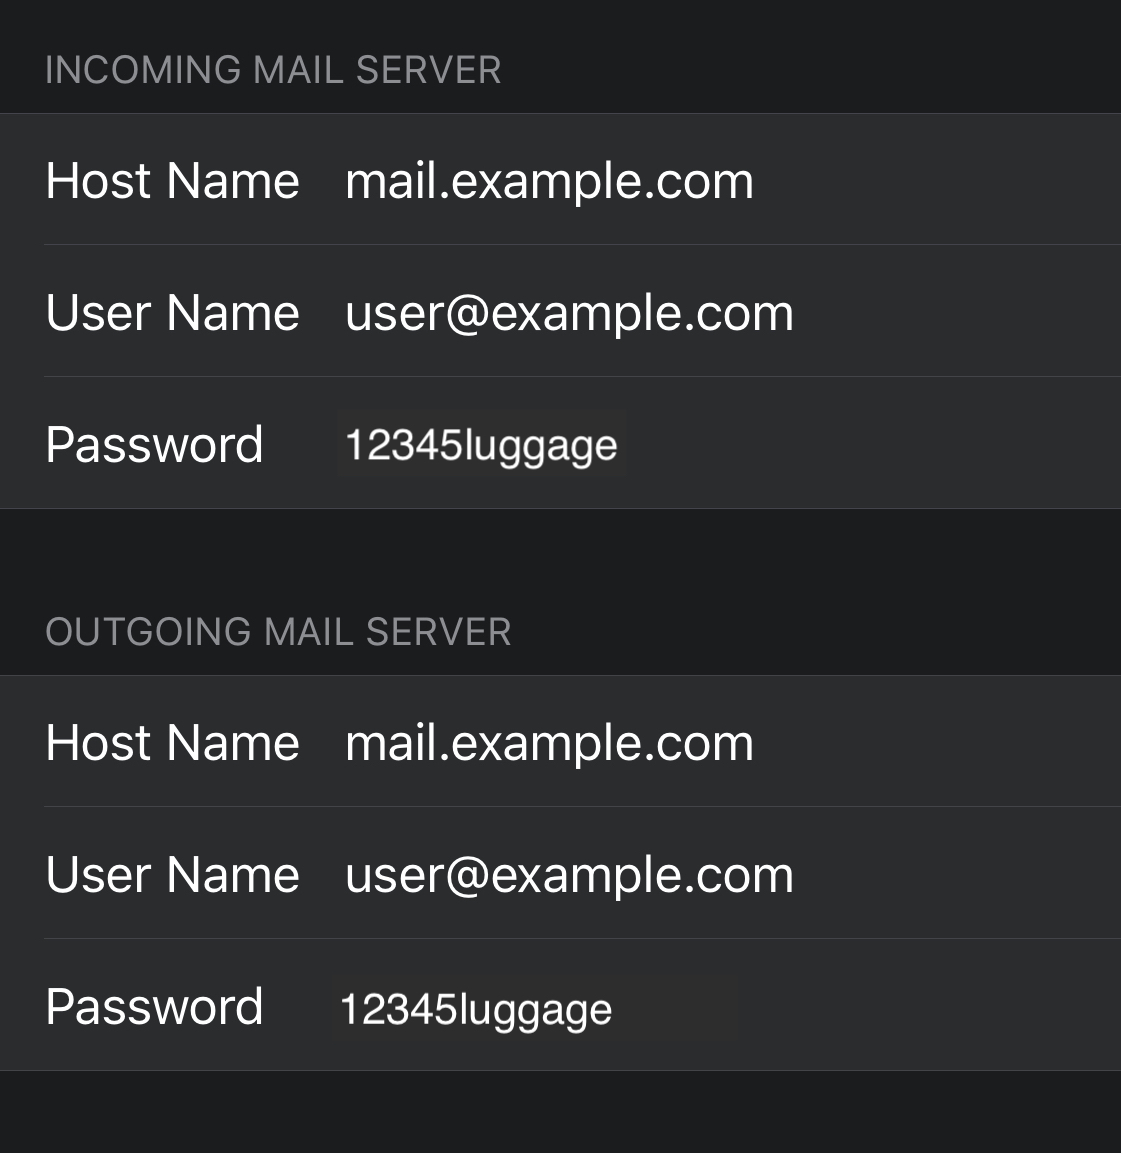
- Use the toggle at the top of the screen to select a mailbox type. Verify all of the information for your account.
- Enter the following information in Incoming Mail Server and Outgoing Mail Server text boxes:
- In the Host Name text box, enter the domain for the email account.
- In the User Name text box , enter your email address.
- In the Password text box , enter the password for the email account.
- Tap Next to proceed to the next screen in the New Account interface.
- Tap the Notes toggle to disable the Notes application for the account.
- Tap Save to complete the account setup process.
Gmail
If you need help with setting up your email client please visit https://support.google.com/mail/answer/6078445?hl=en&co=GENIE.Platform%3DAndroid or contact Gmail support.
- This guide was created using Android version 10.0.0 on a Google Pixel™ 3.
- You can set up calendars, contacts, and email on an Android device all at once with Exchange ActiveSync. Read our How to Sync Calendars, Contacts, and Email on Android™ Devices documentation.
- Swipe up from the bottom of your device and tap the Settings icon.
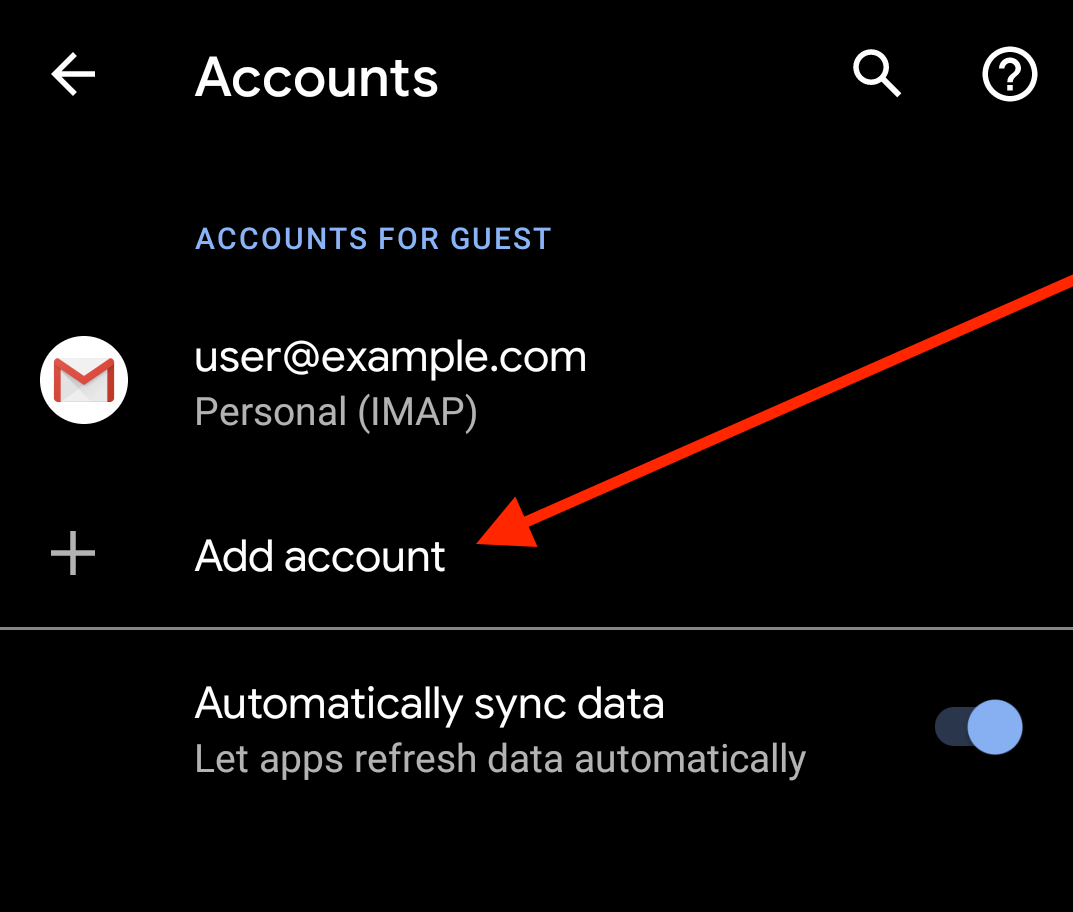
- In the Settings menu, tap on Accounts. The Accounts interface will appear.
- Tap on Add Account. The Add an account interface will appear.
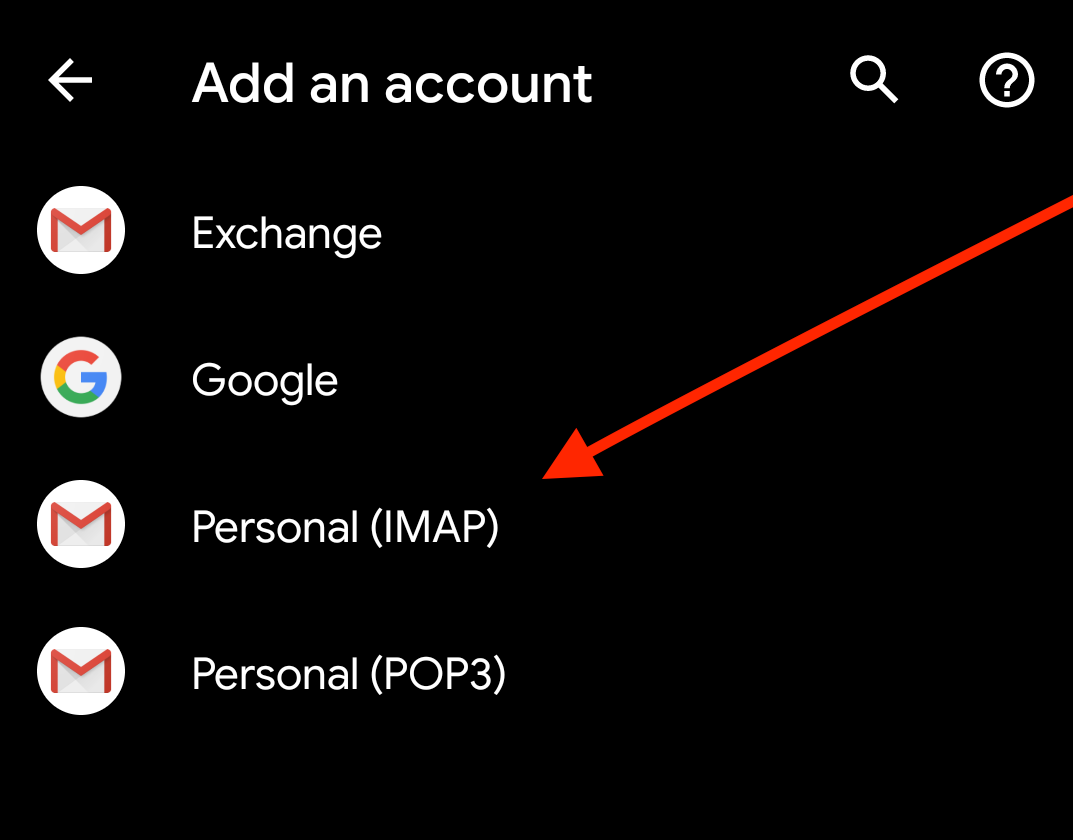
- In the Add an account interface, tap Personal (IMAP).
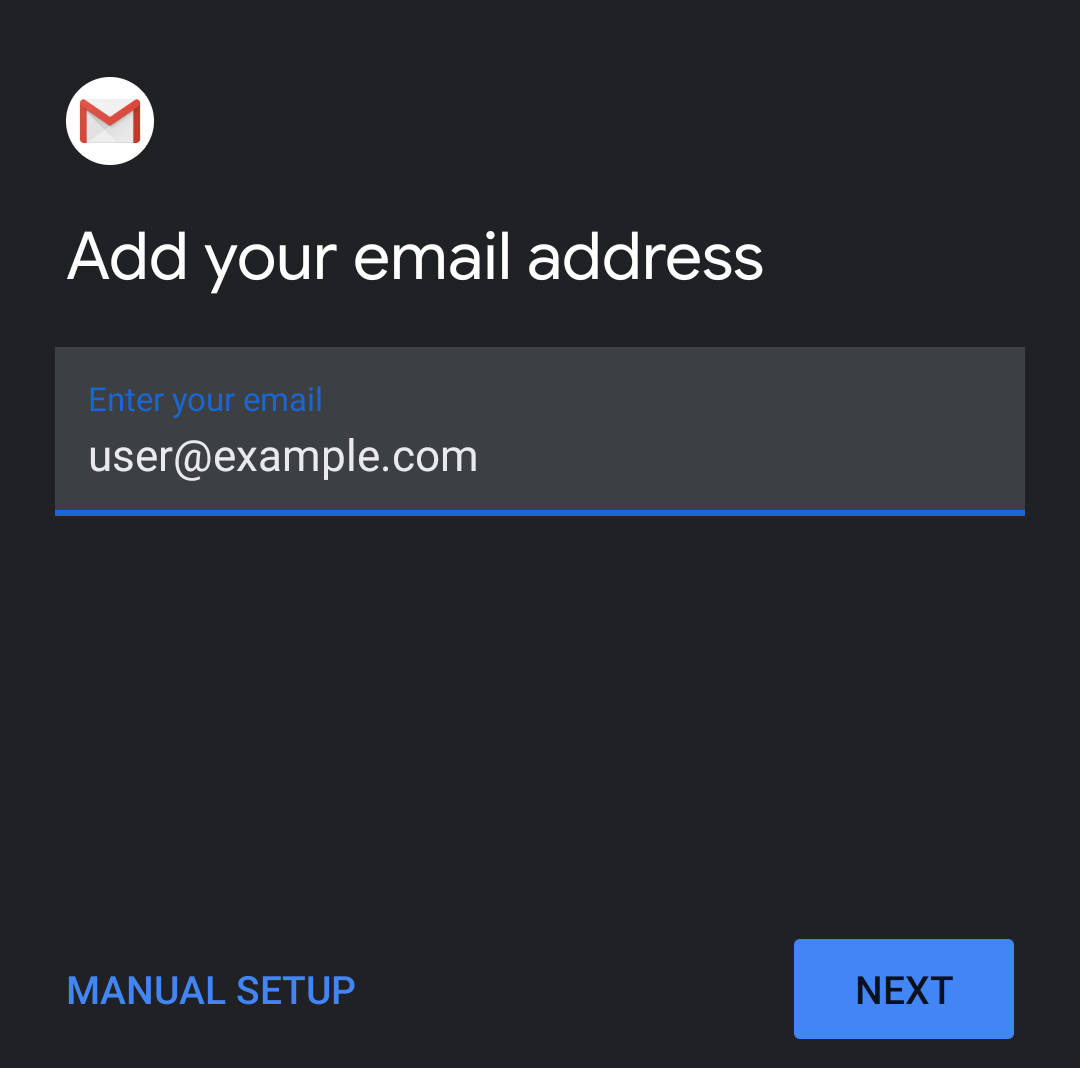
- In the Enter your email text box, enter your full email address. Tap Next.
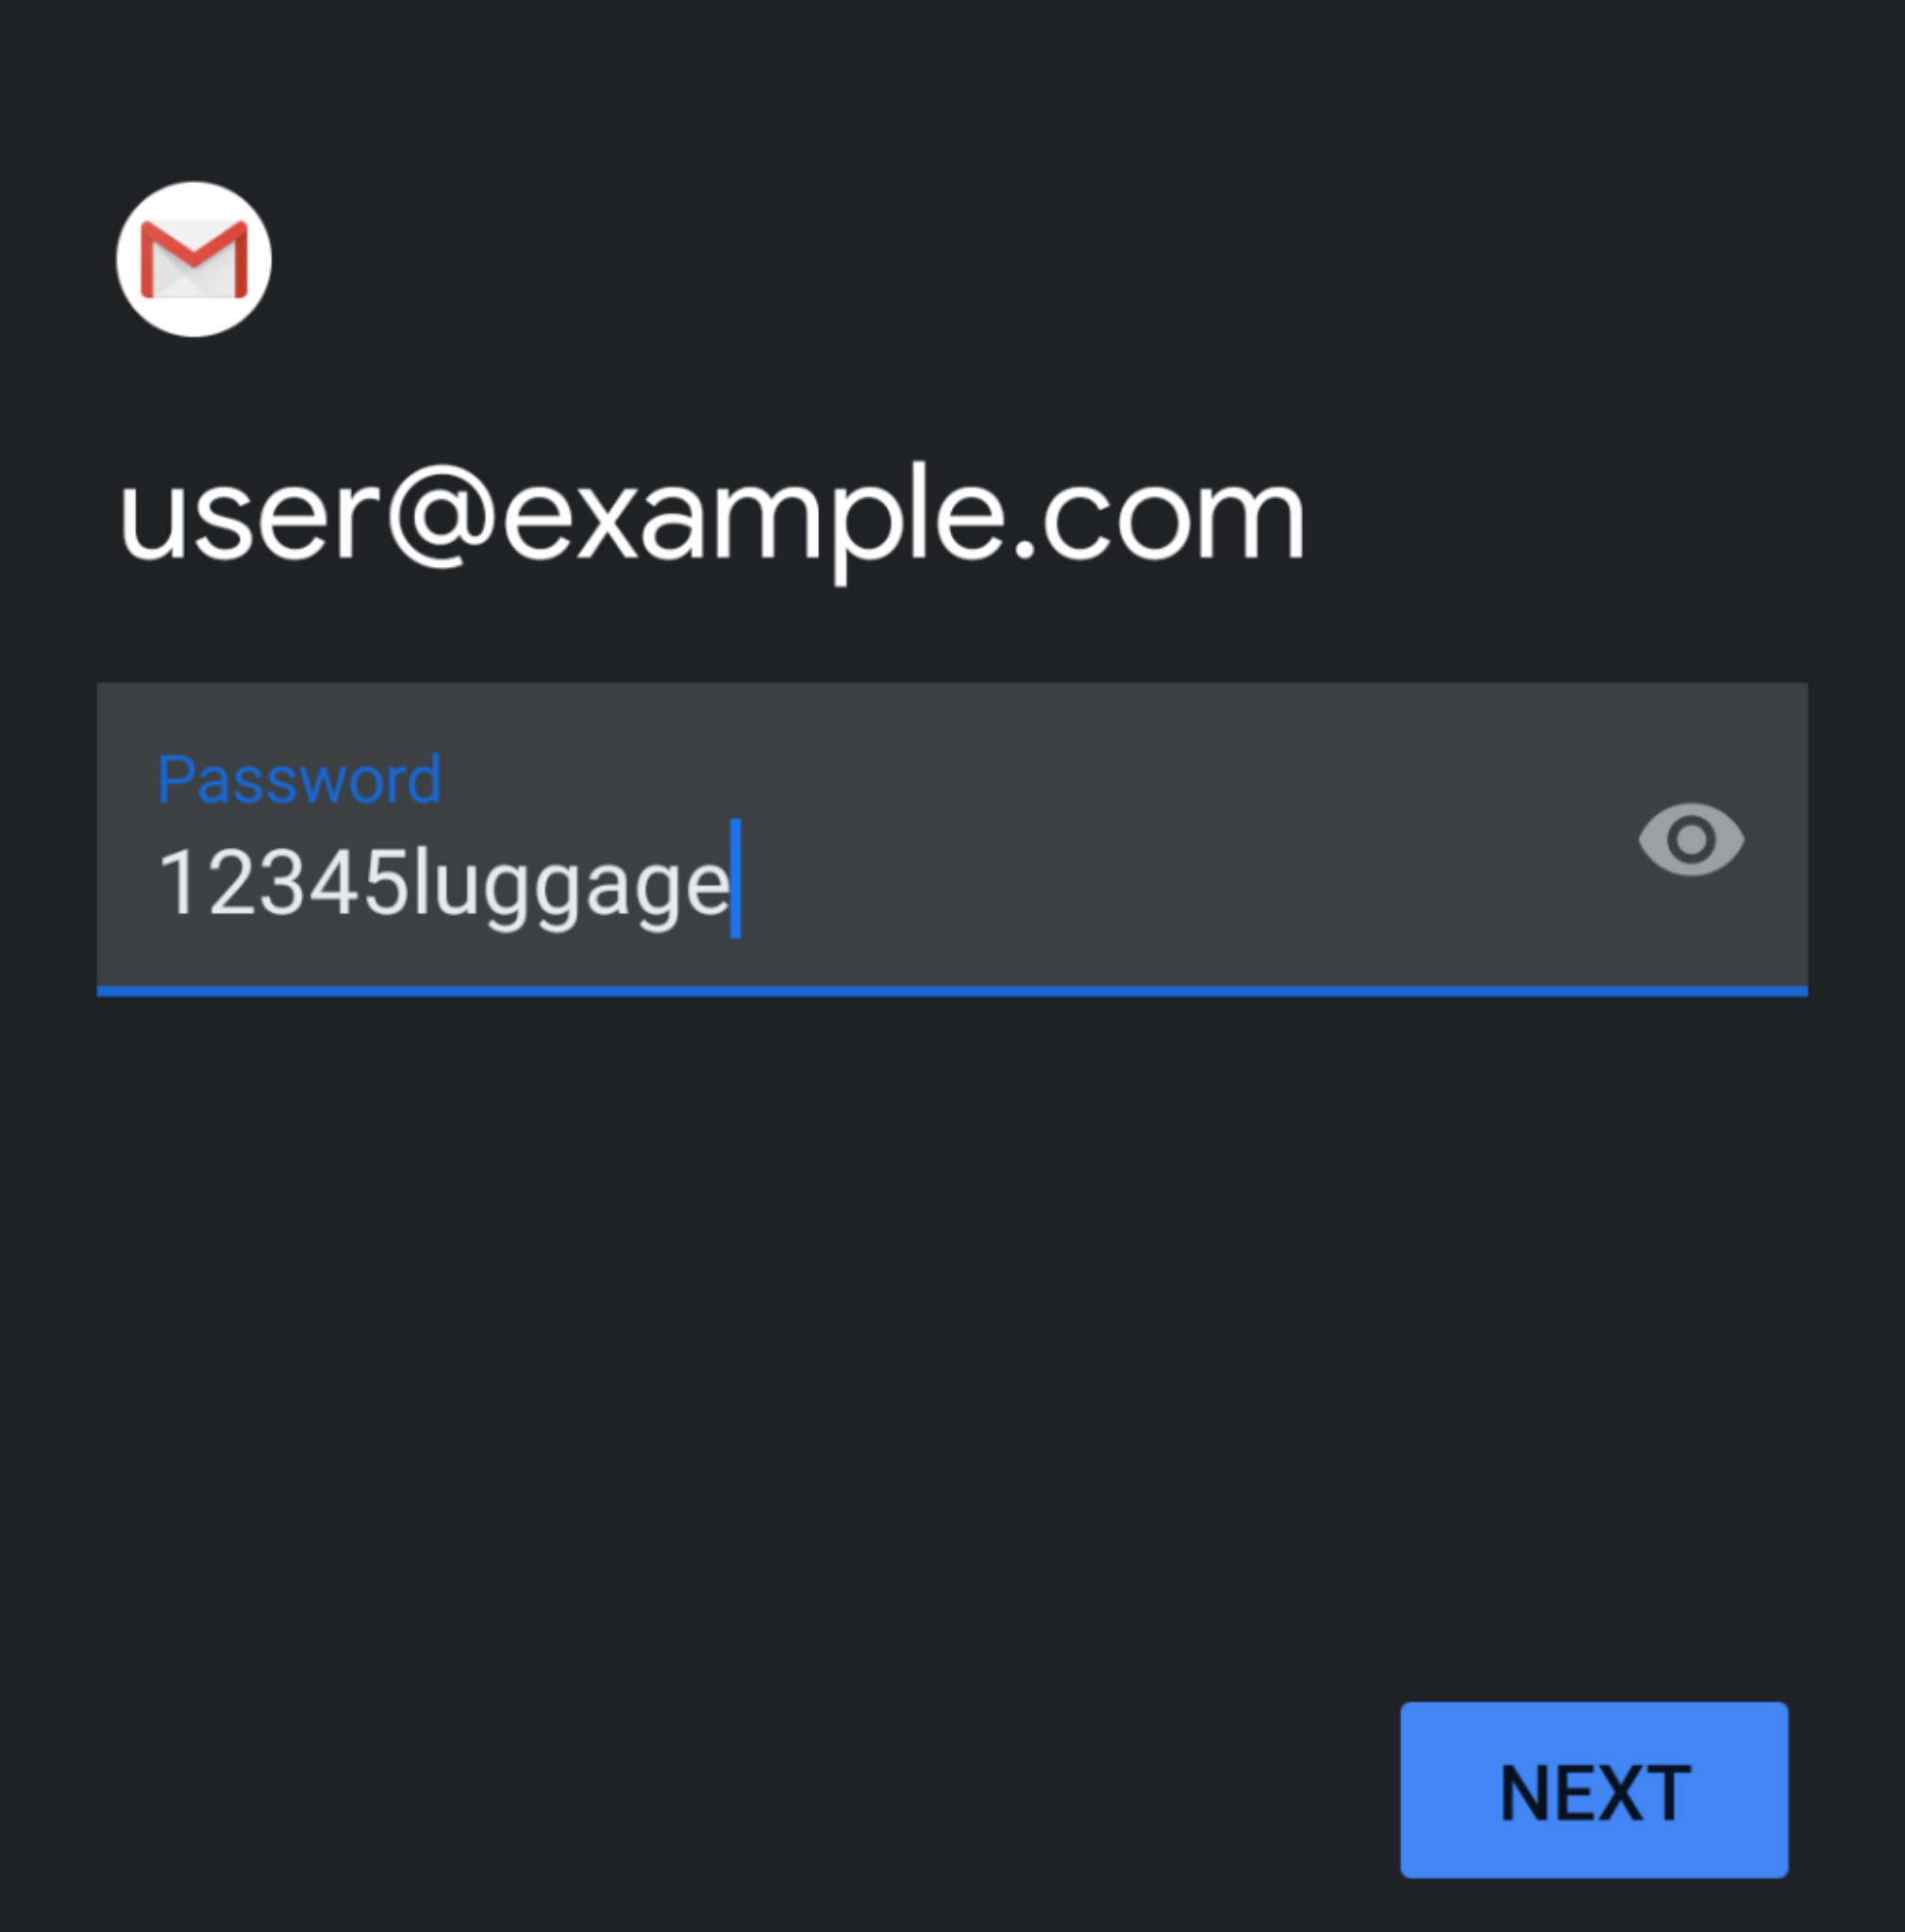
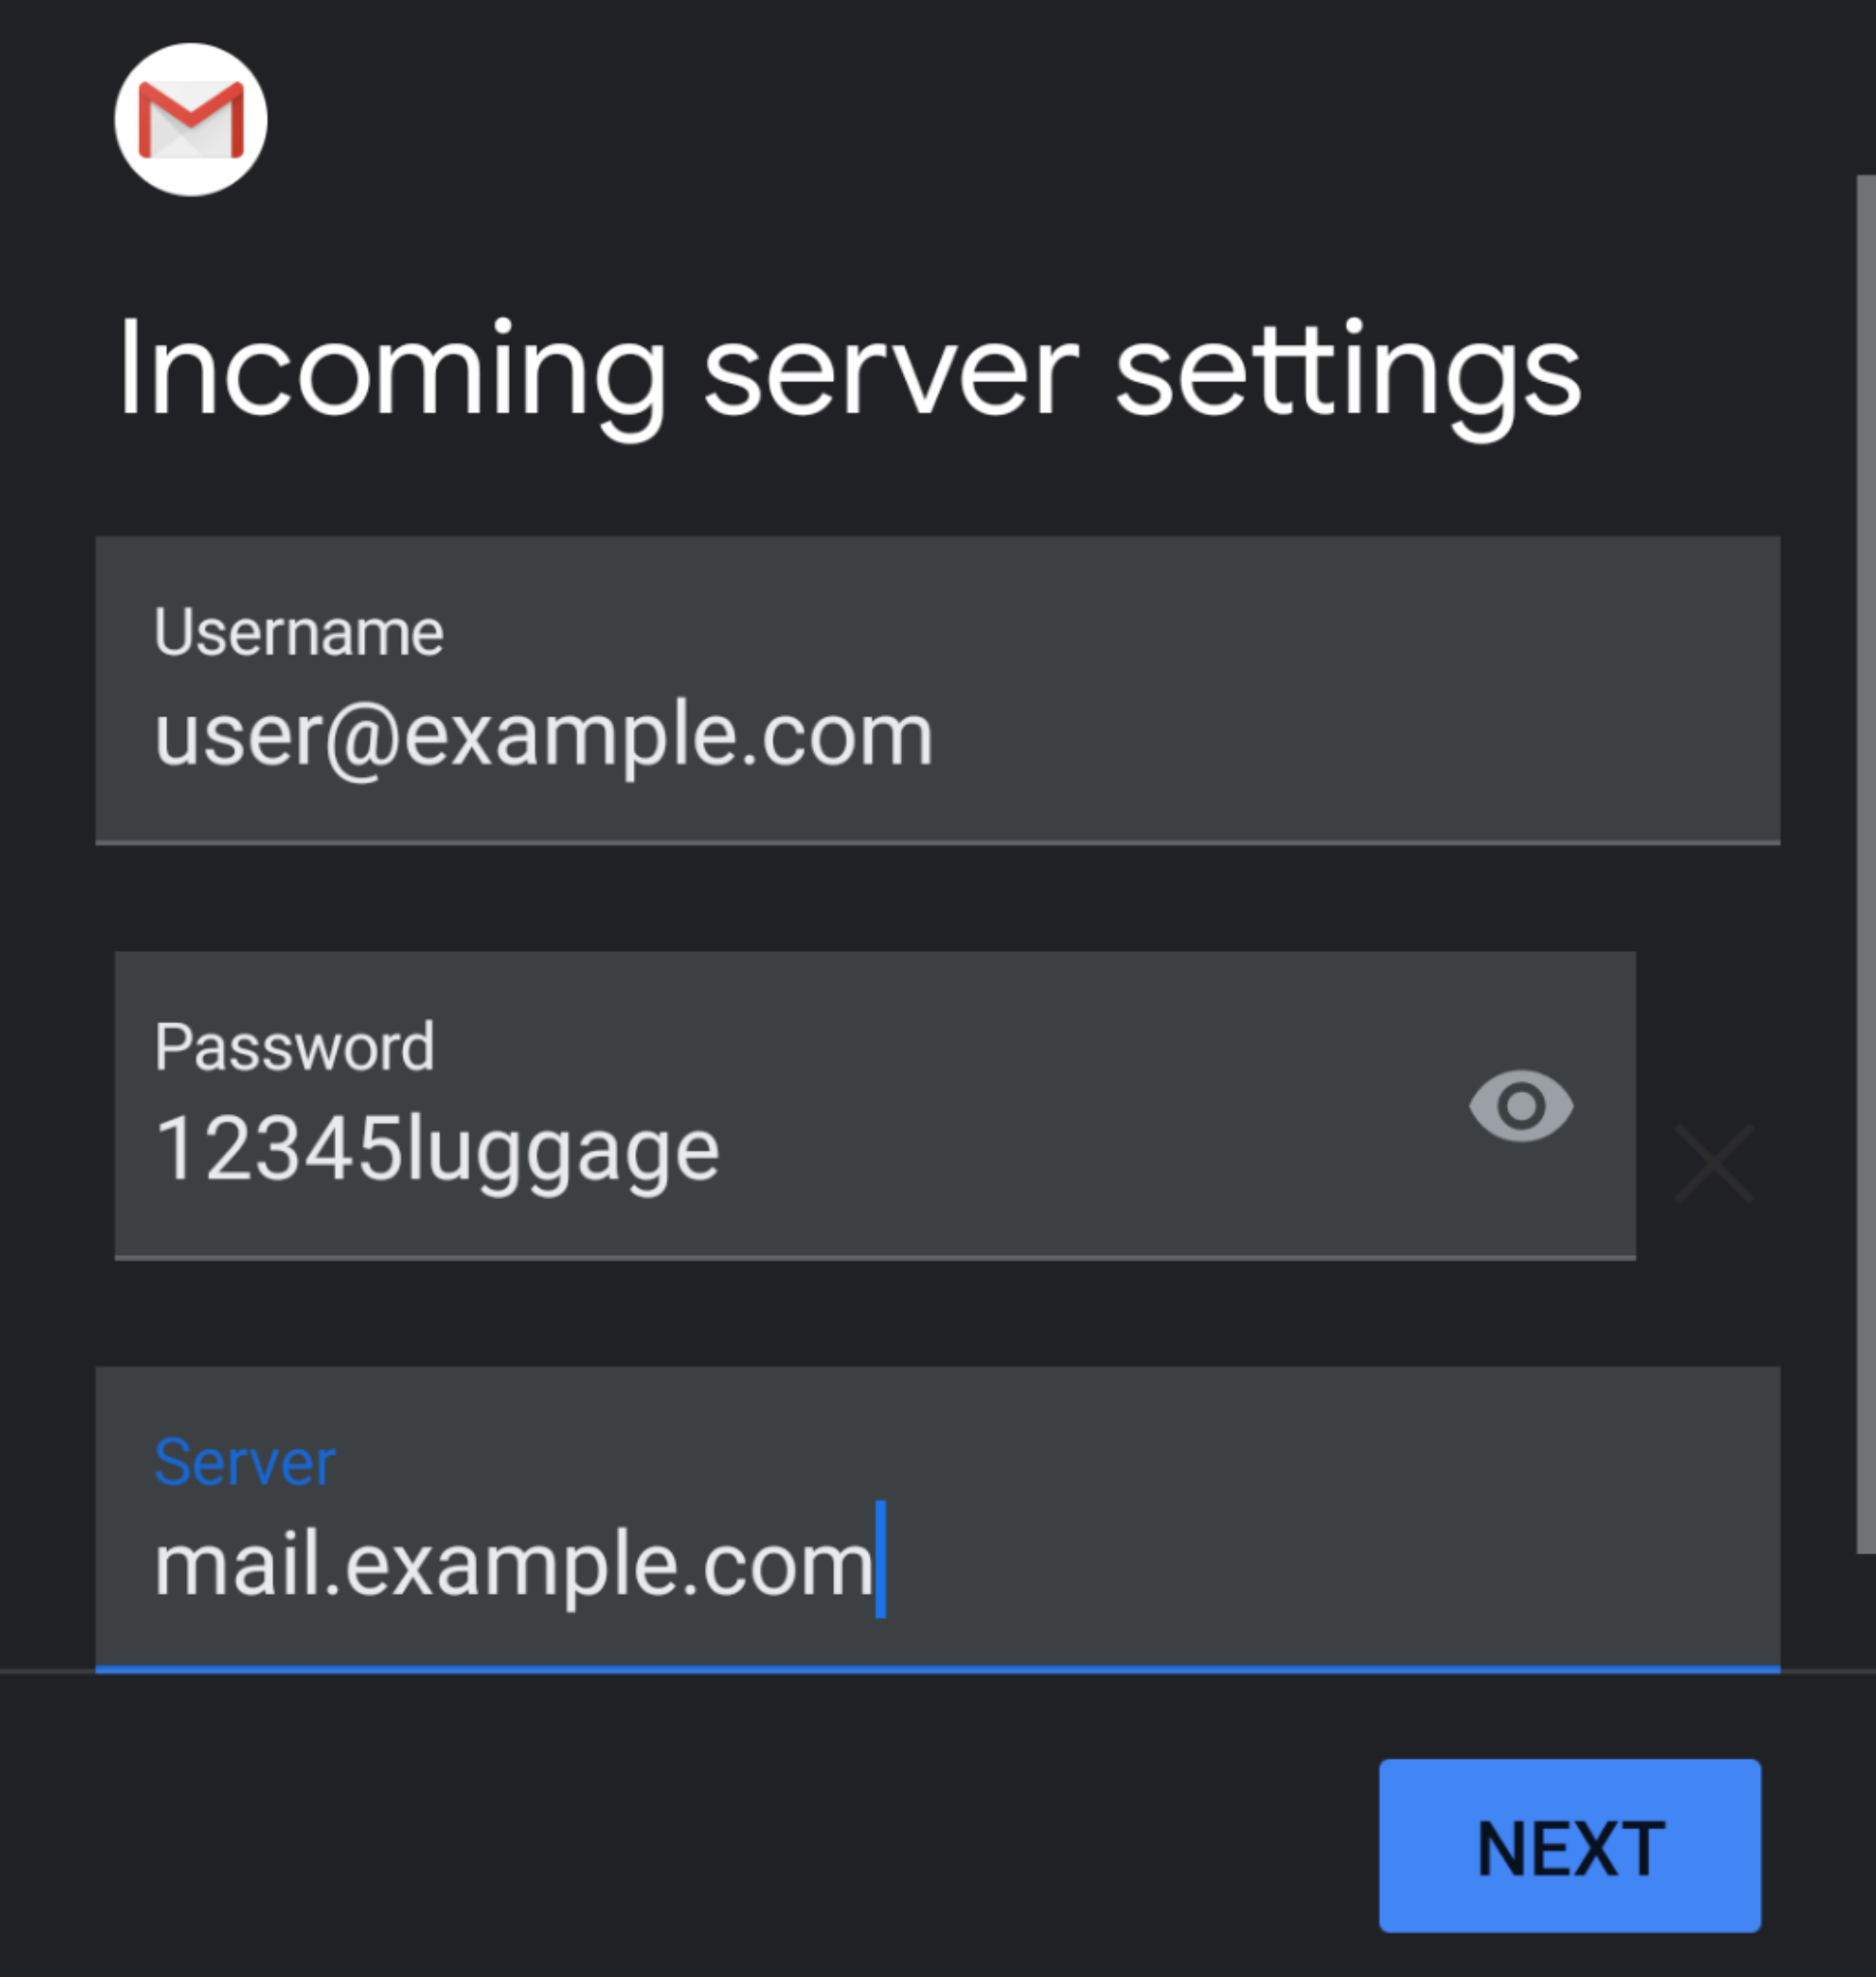
- Enter your password in the Password text box. Tap Next. This will open the Incoming server settings
- Your Username and Password will be automatically filled with your previously entered information.
- In the Server text box, enter the host name information.
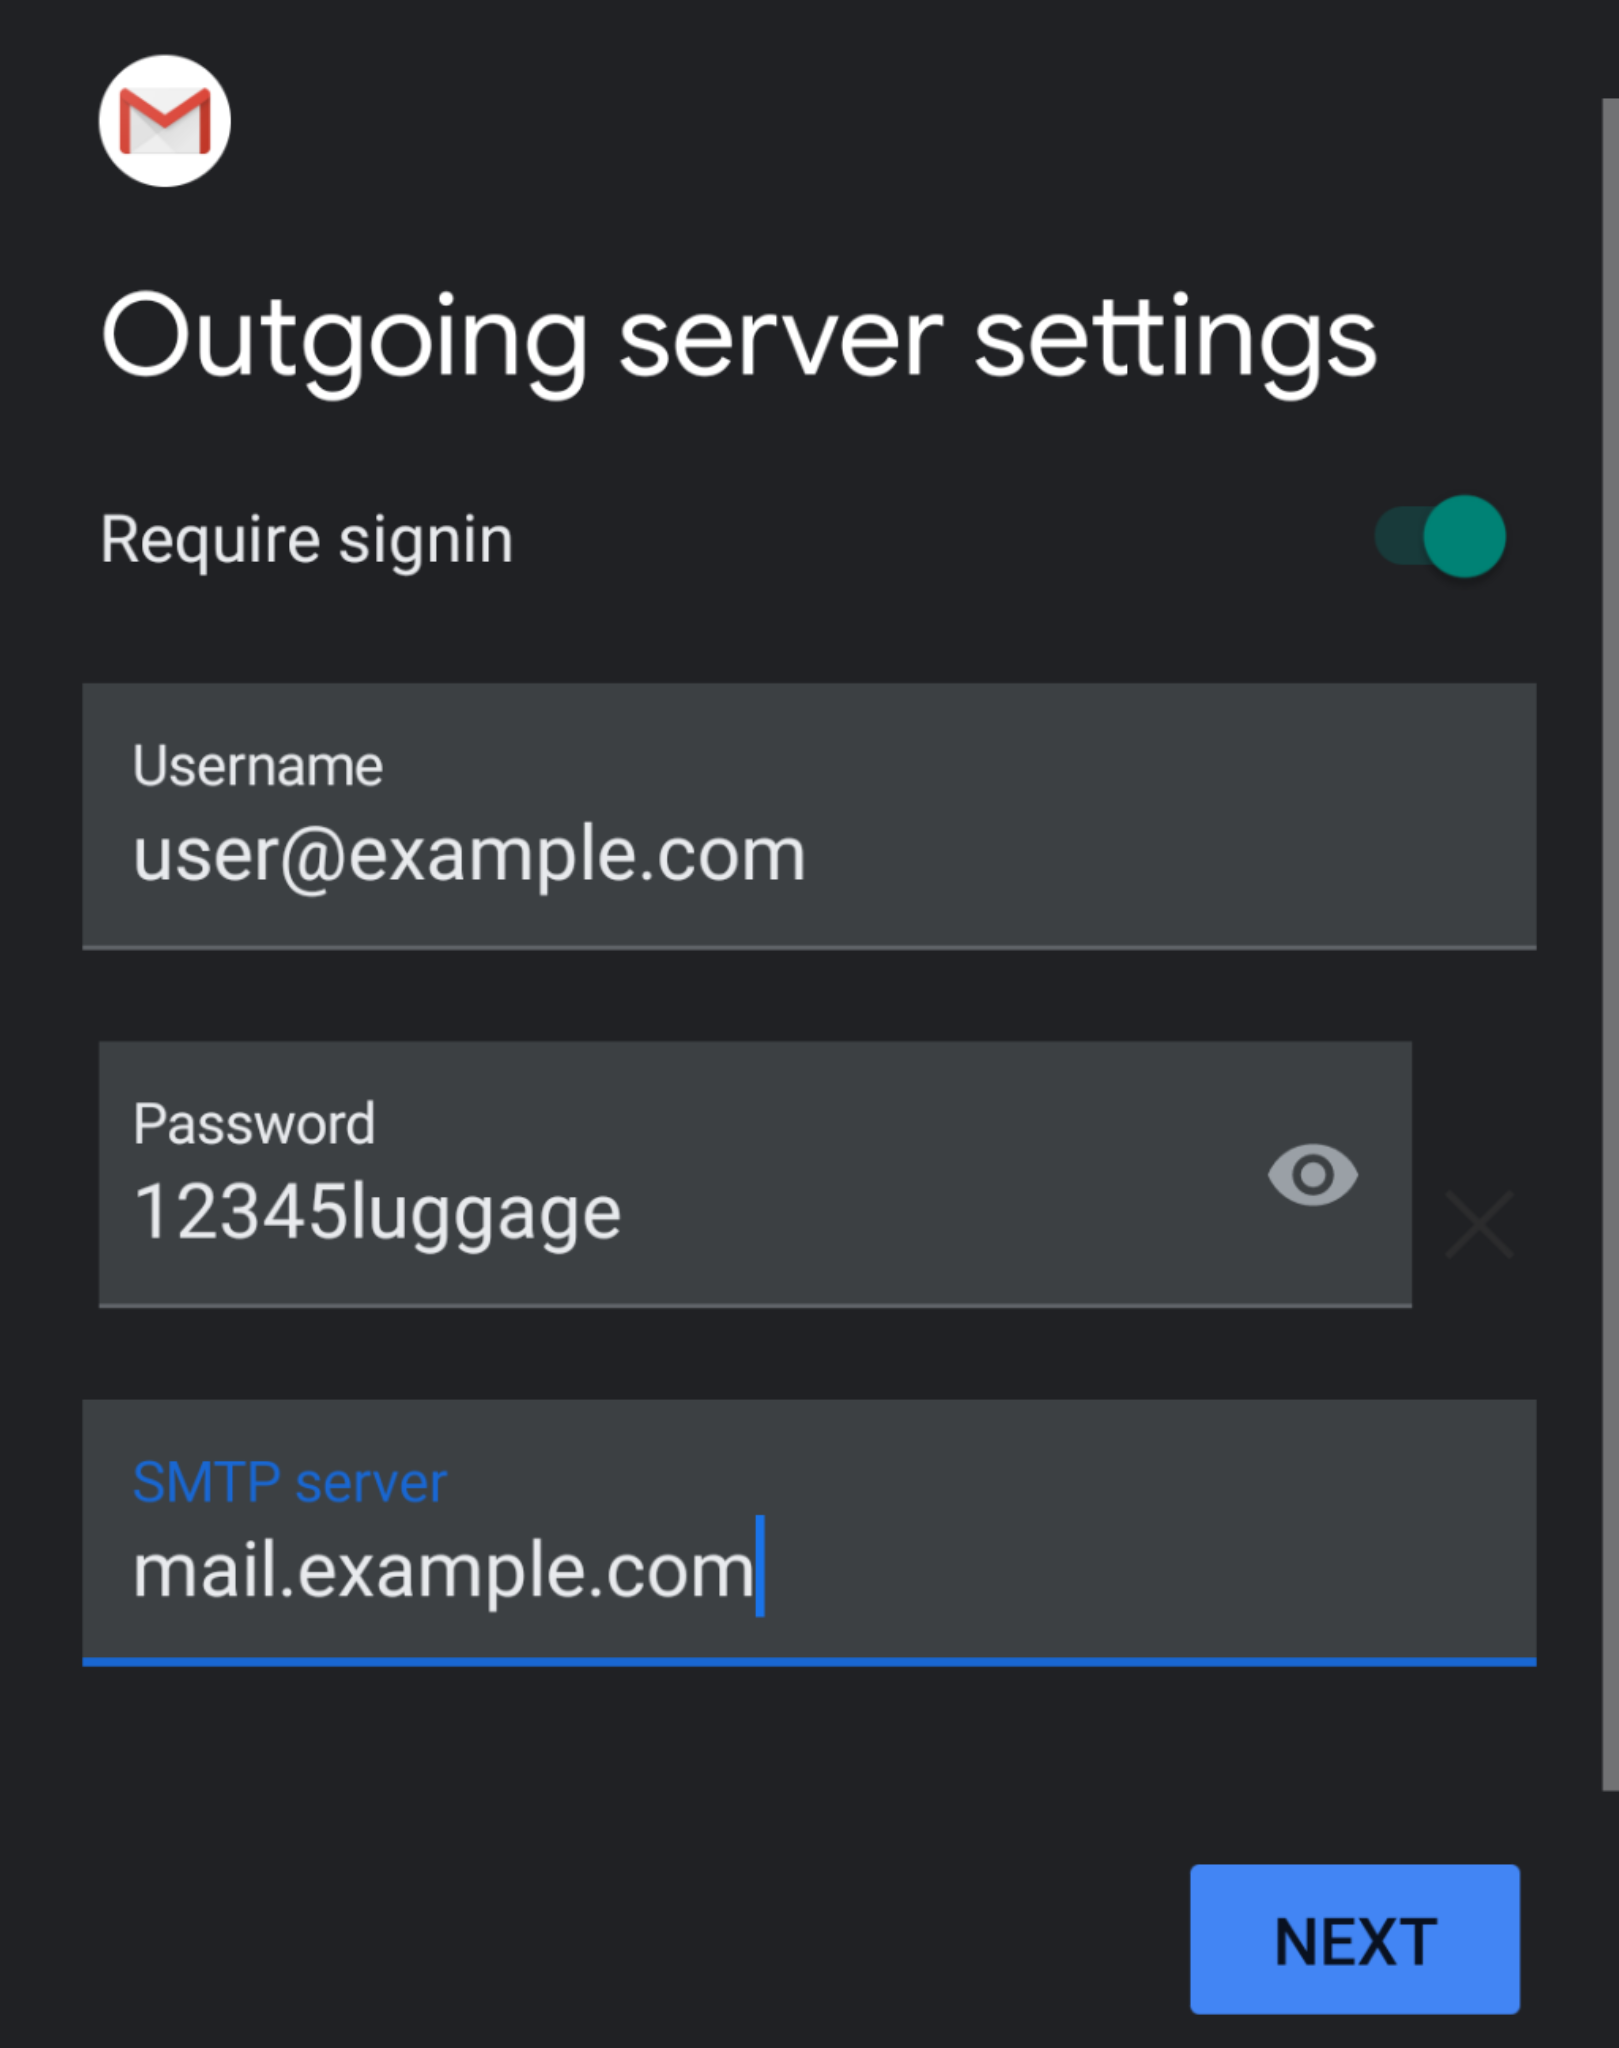
- Tap Next. The Outgoing server settings interface will appear.
- Your Username and Password will be automatically filled in with your previously entered information.
- In the Server text box, enter the host name information.
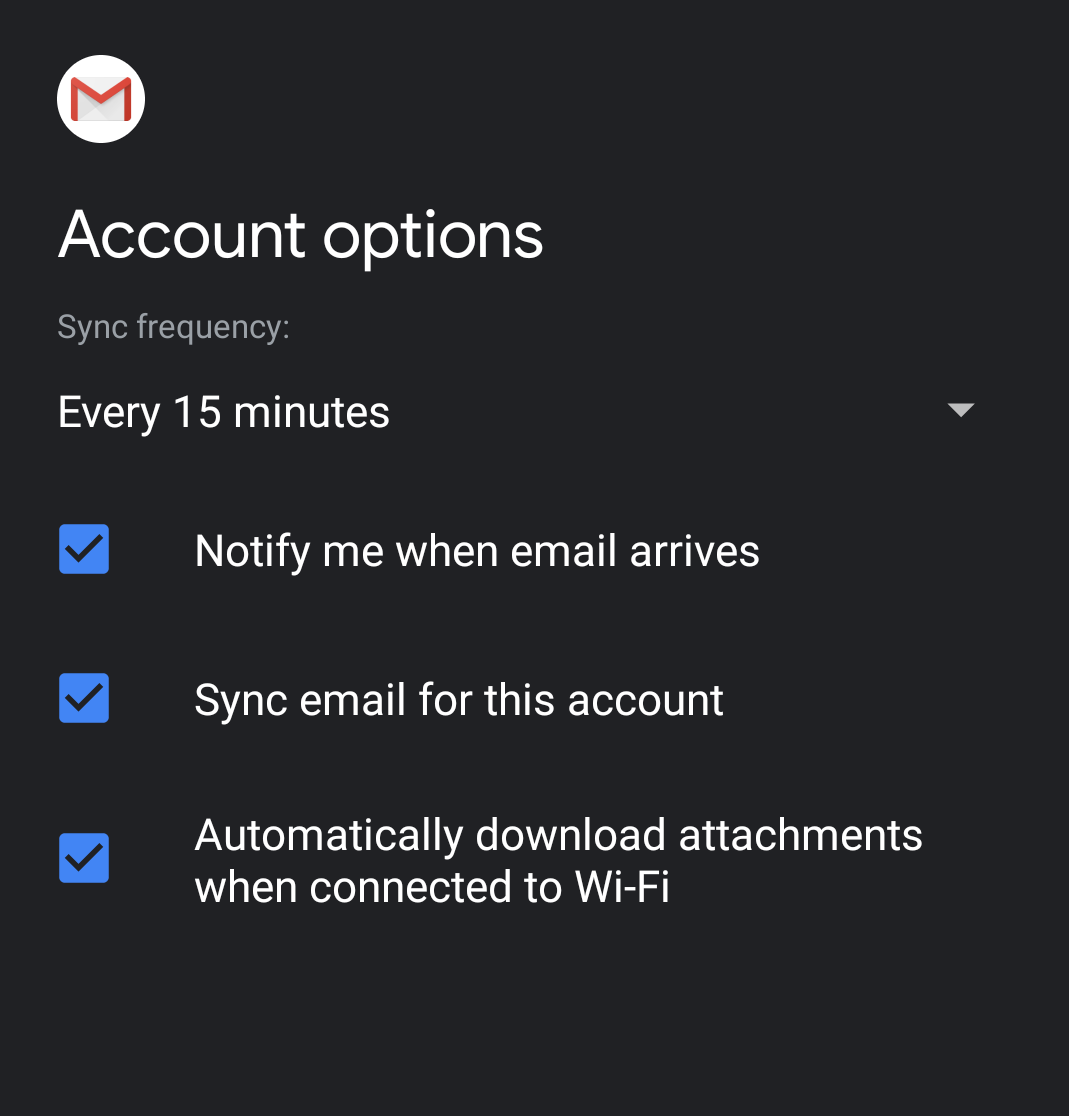
- Tap Next. The Account options interface will appear.
- Enter the following information in the Account options interface. you may set your sync frequency and email notifications.
- Select how often your email syncs to the server from from the Sync frequency menu options.
- To get notifications when email arrives, check the Notify me when email arrives checkbox.
- To automatically sync email for this account, check the Sync email for this account checkbox.
- To automatically download attachments when connected to Wi-Fi, check the Automatically download attachments when connected to Wi-Fi checkbox.
- Tap Next. The confirmation page will appear.
- Tap Next. Your mail client is now ready.
Outlook
If you need help setting up your email client please visit https://support.microsoft.com/en-us/office/setup-outlook-for-ios-and-android-5a8bb76e-9bcb-4cf0-ae94-bda414104d16 or contact Outlook support.
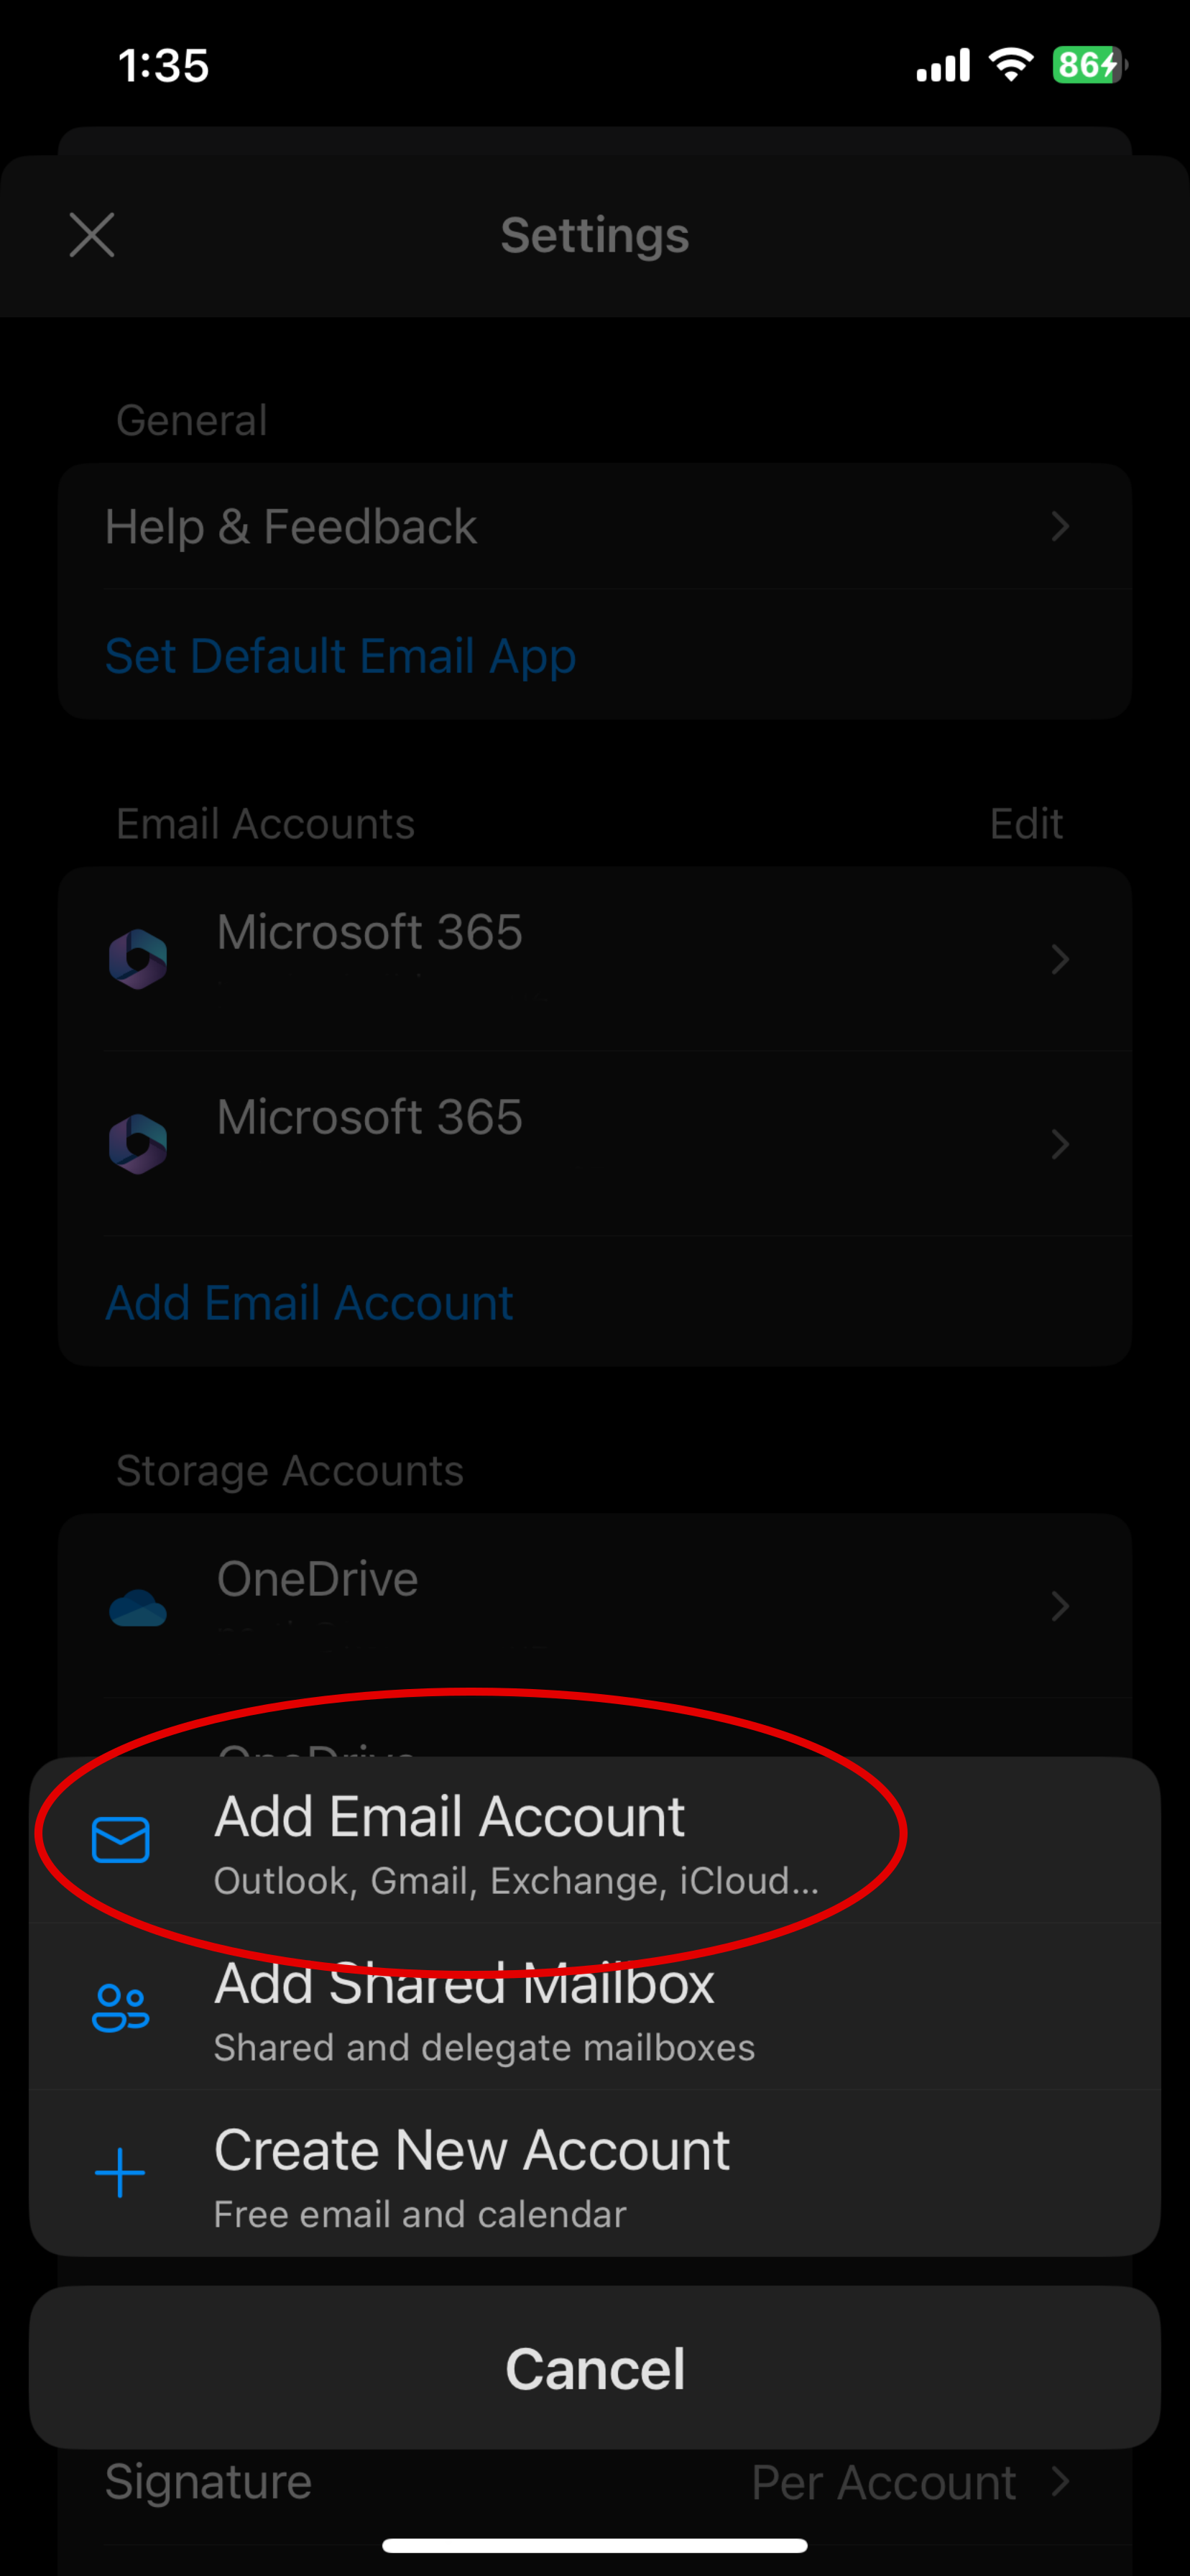
- Open the Outlook app and go to Settings
- Click Add Email Account
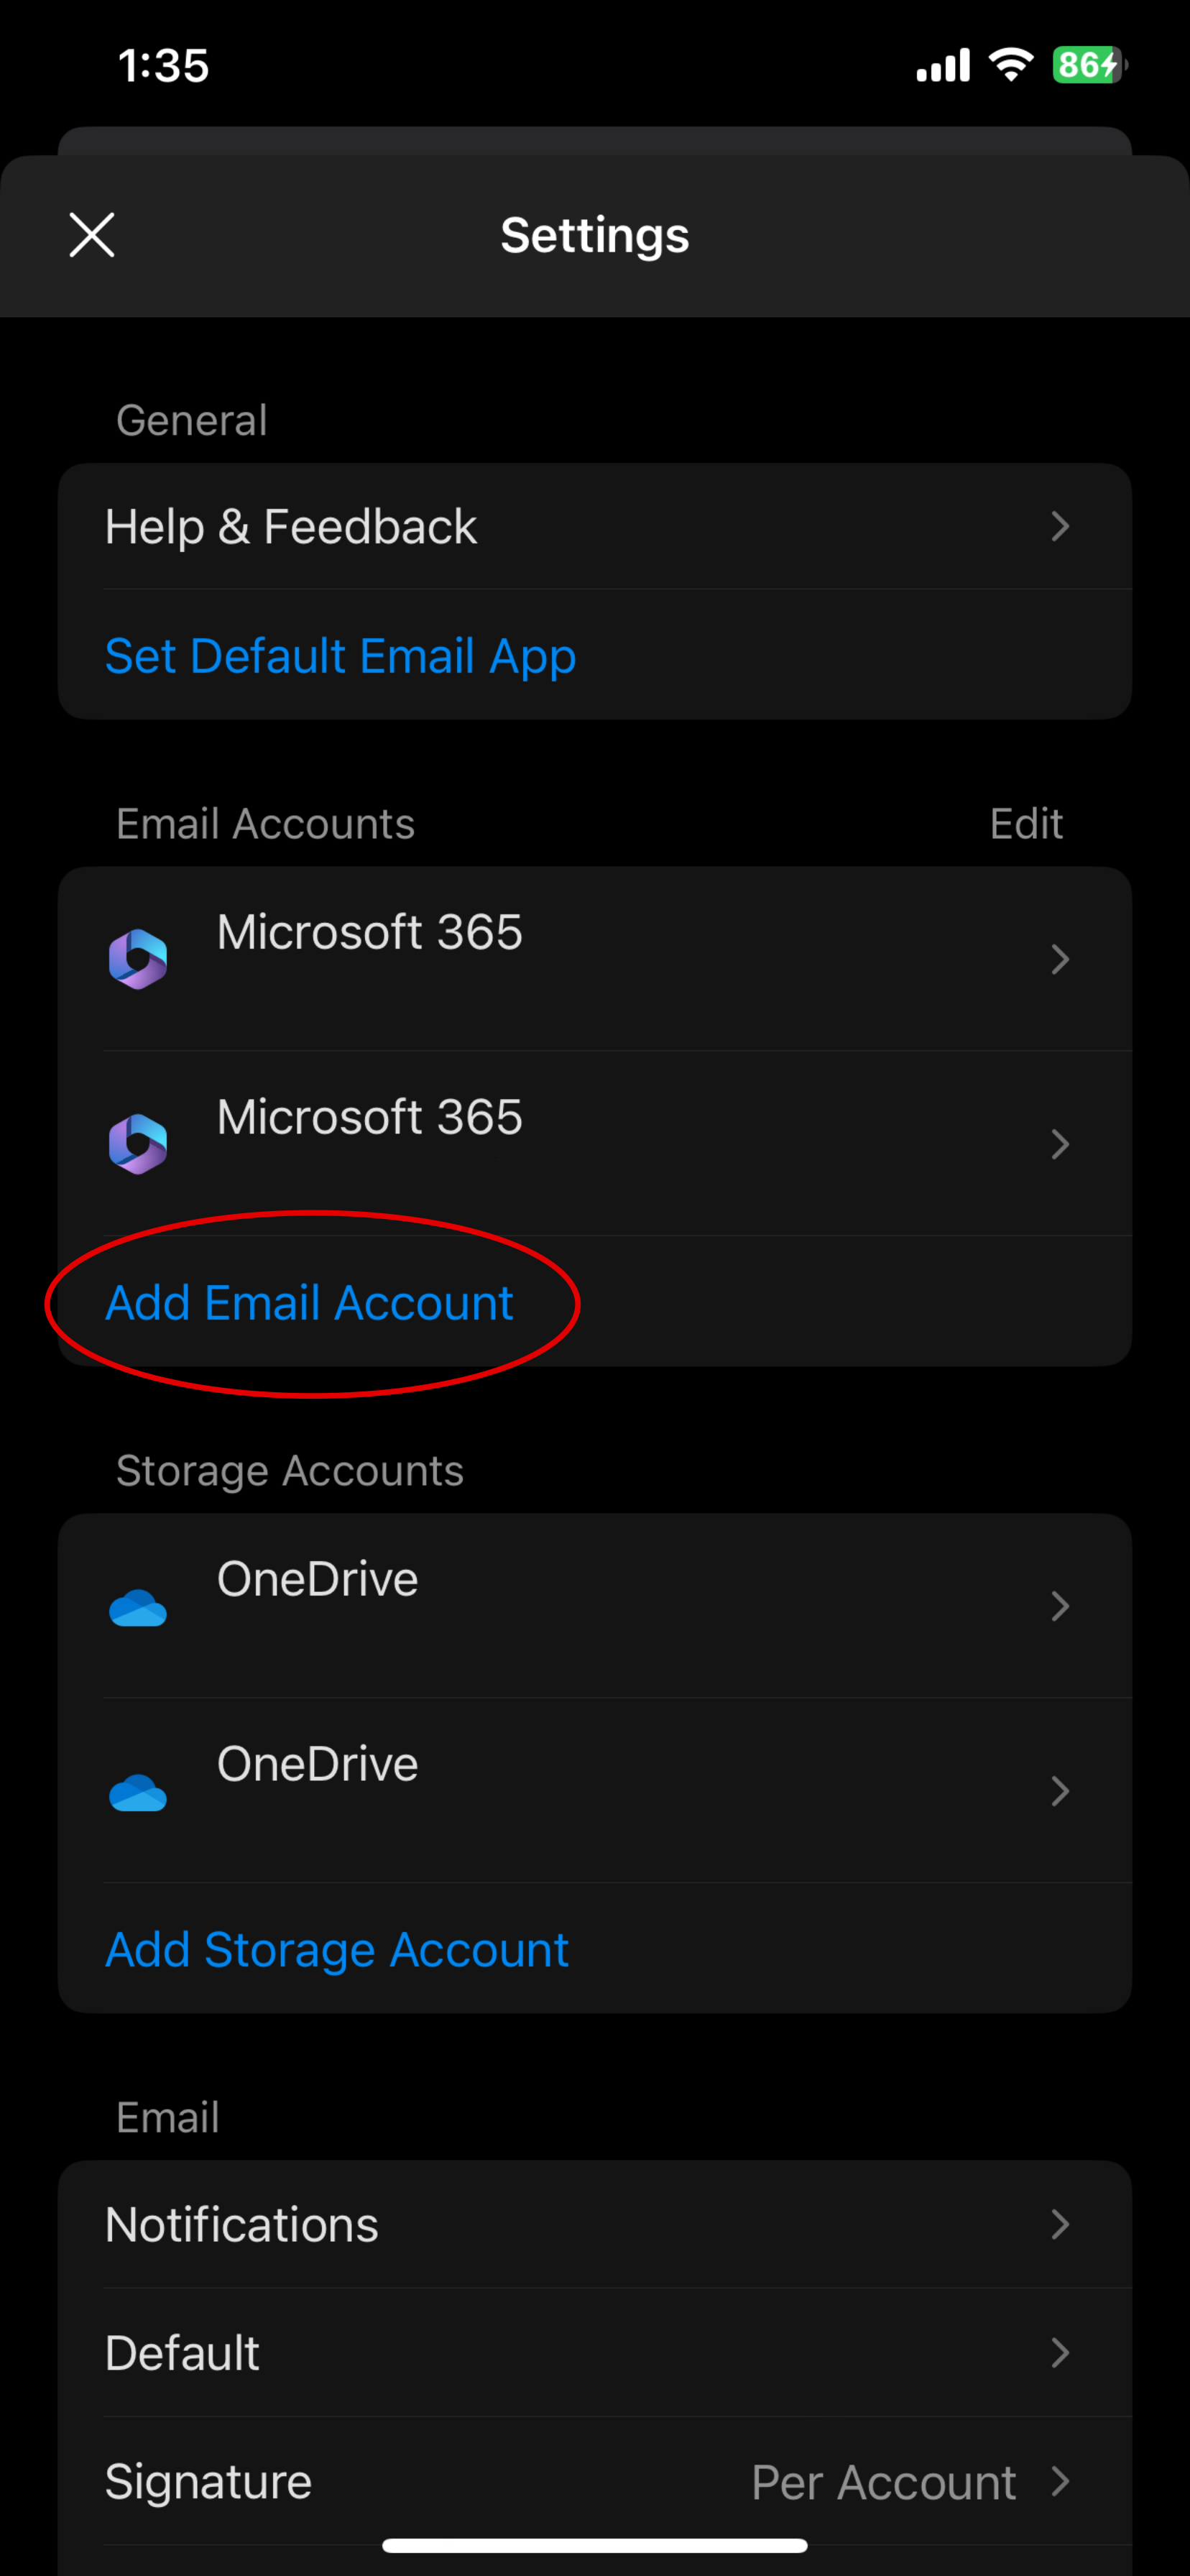
- Click Add Email Account on the pop up
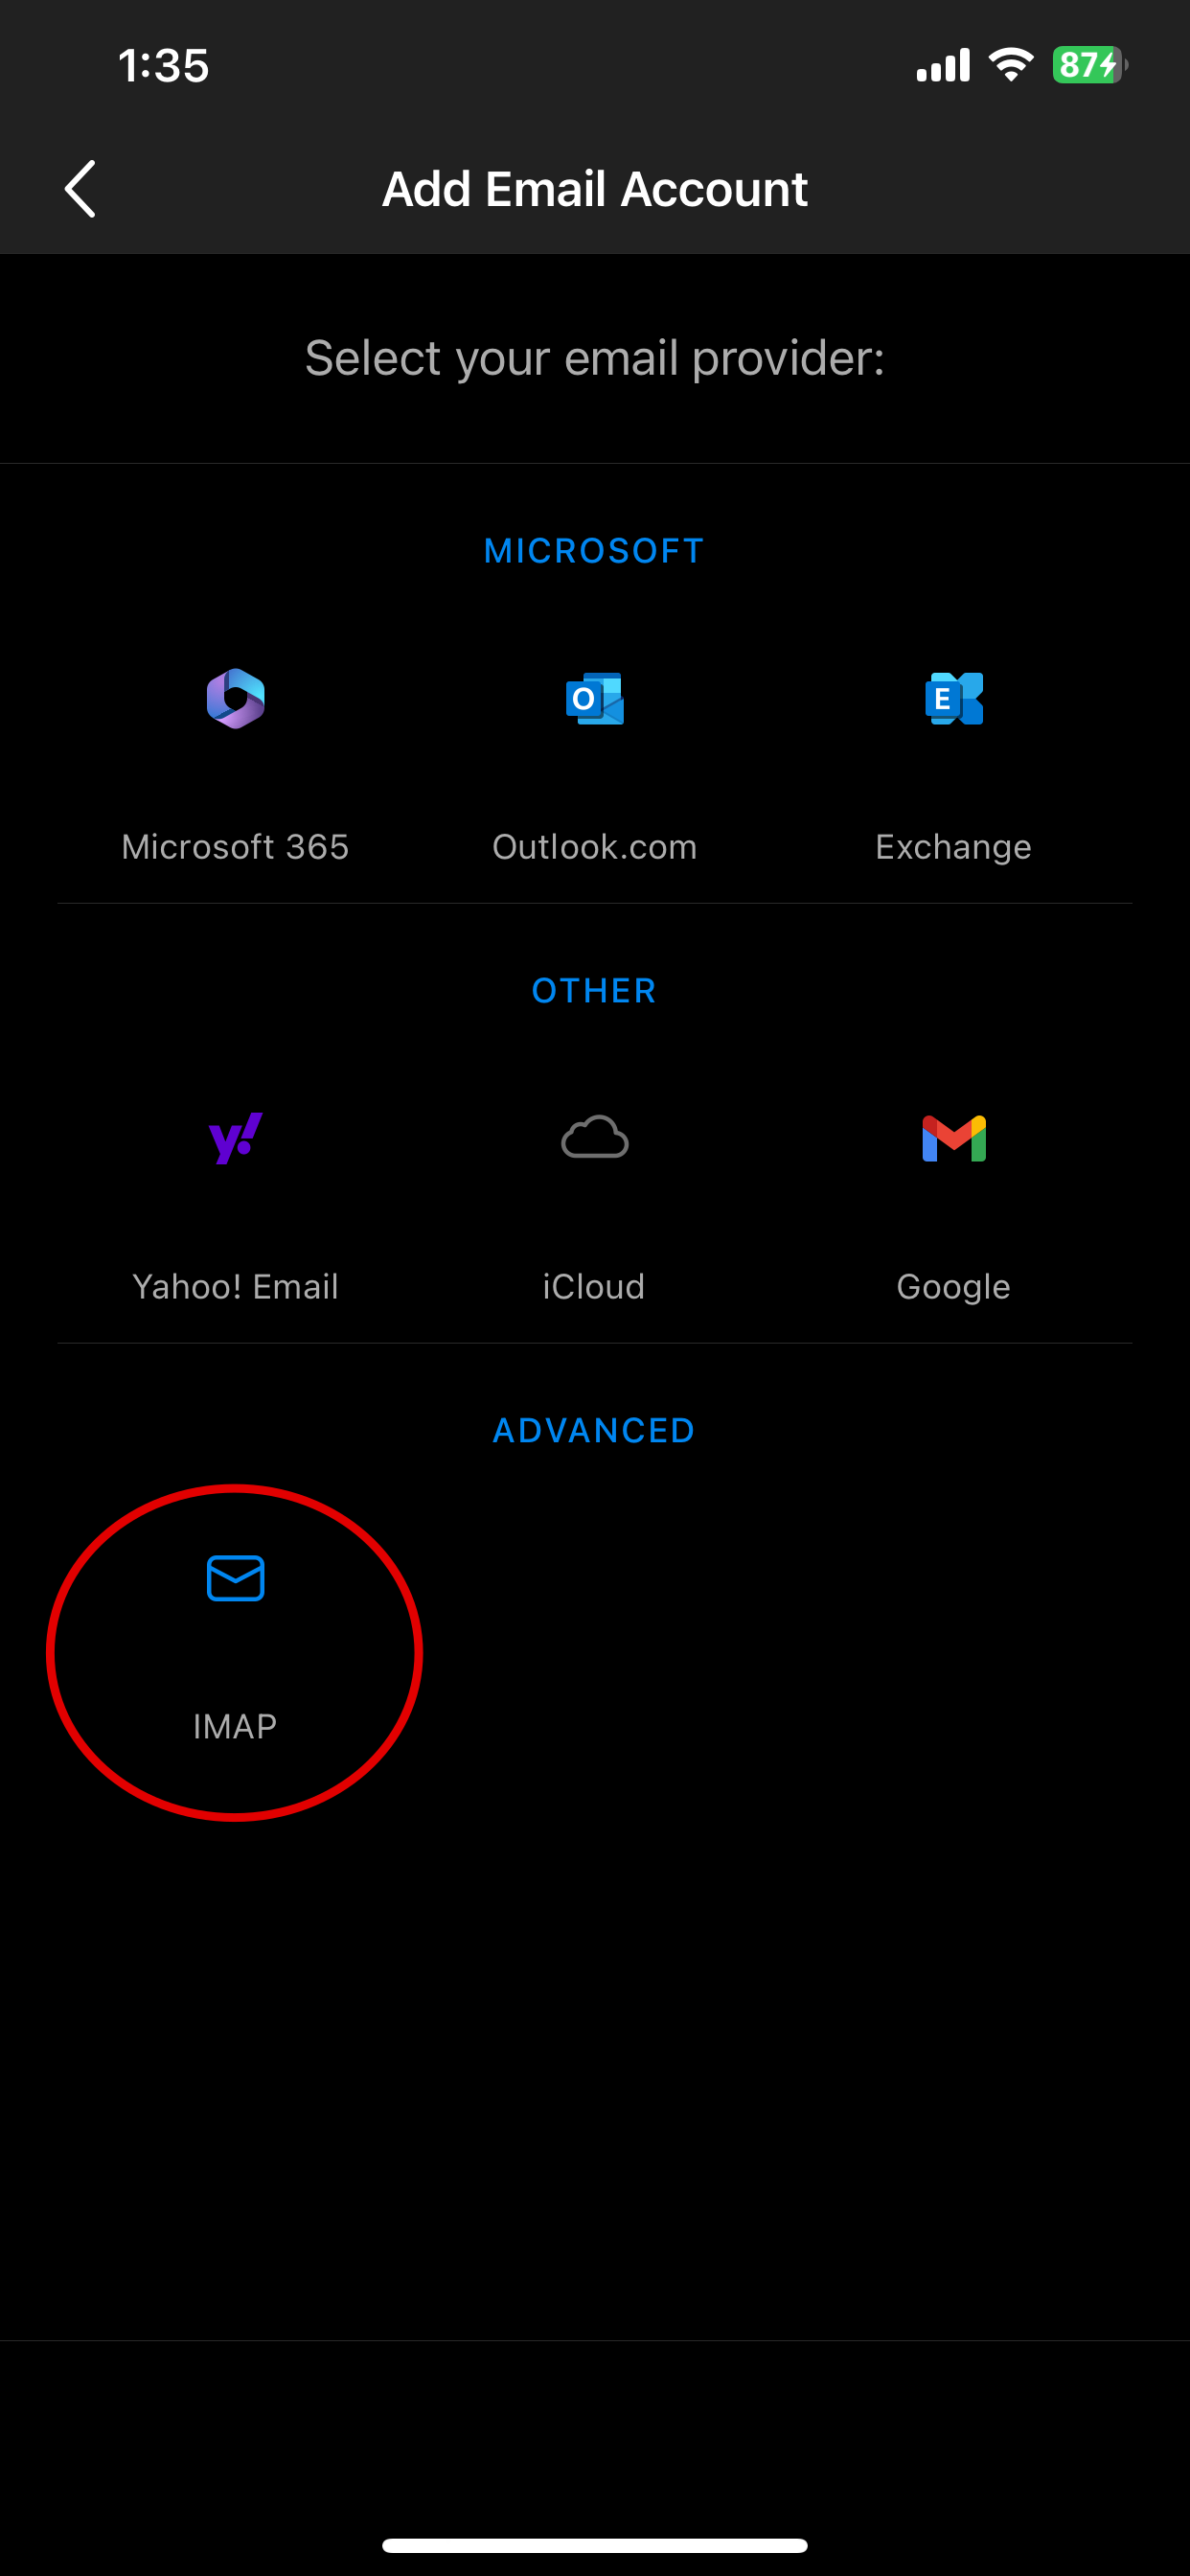
- Enter your email address and click Add Account

- Choose IMAP and enable Advanced Settings
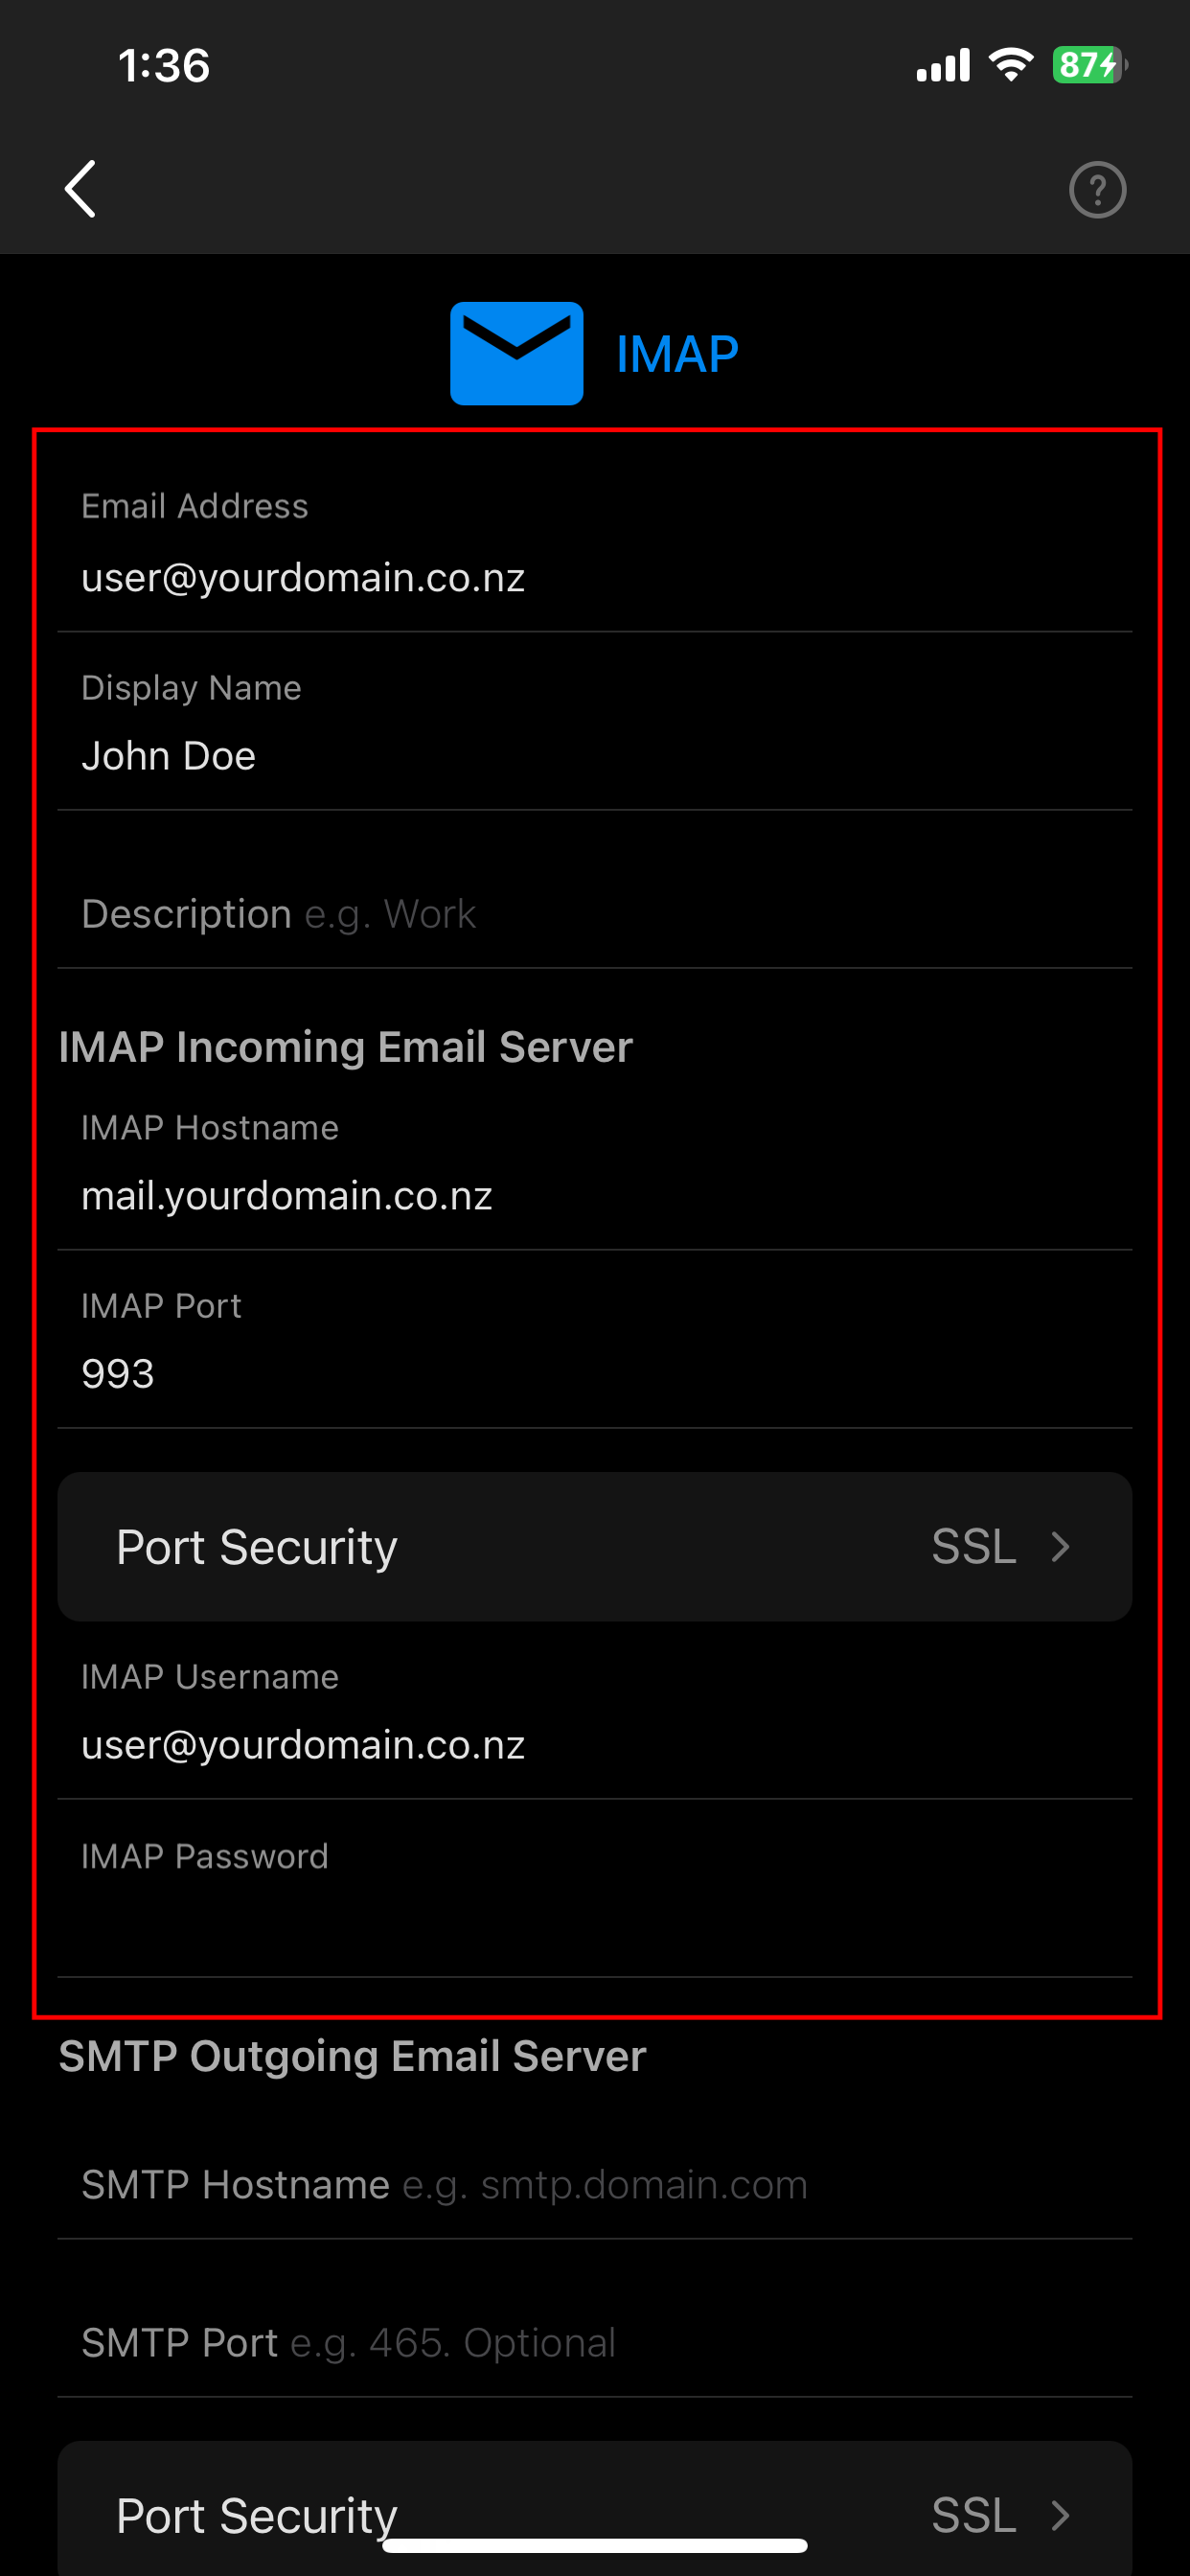
- Enter the following settings:
- Display Name: The name you want on emails when sending
- IMAP Hostname: mail.yourdomain.co.nz
- IMAP Port: 993
- Port Security: SSL
- IMAP Username: Your email address
- IMAP Password: Your email address’s password
- SMTP Hostname: mail.yourdomain.co.nz
- SMTP Port: 465
- Port Security: SSL
- SMTP Username: Your email address
- SMTP Password: Your email address’s password
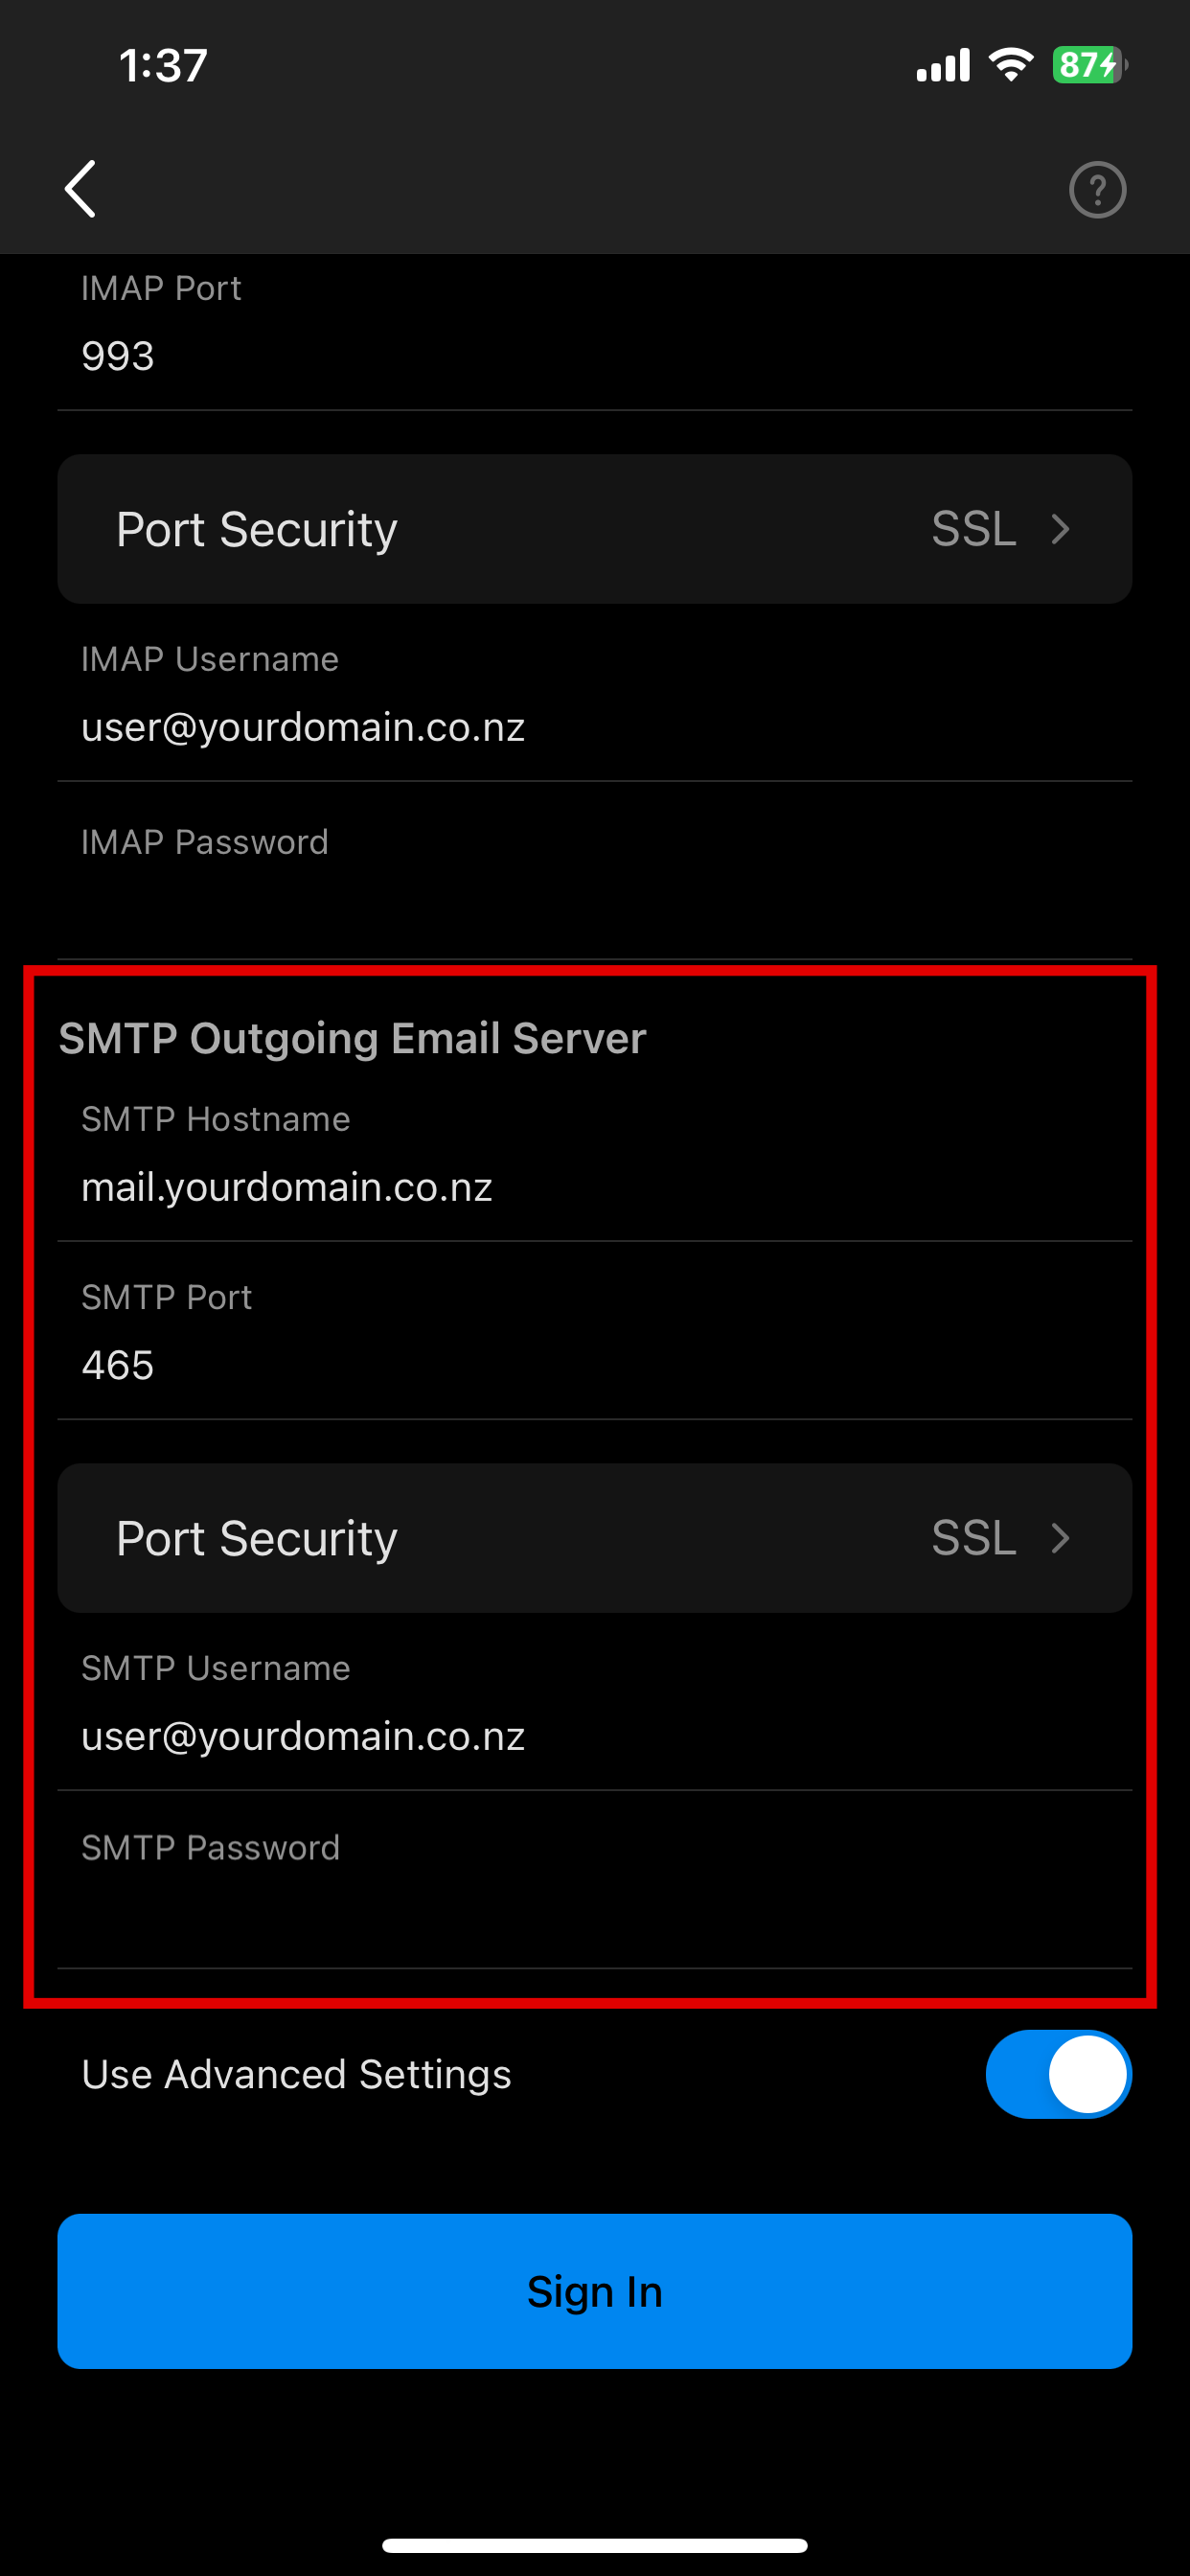
- Click Sign In
Samsung Mail
If you need help setting up your email client please visit https://www.samsung.com/uk/support/mobile-devices/how-to-set-up-email-app-on-samsung-phone-or-tablet/ or contact Samsung support.
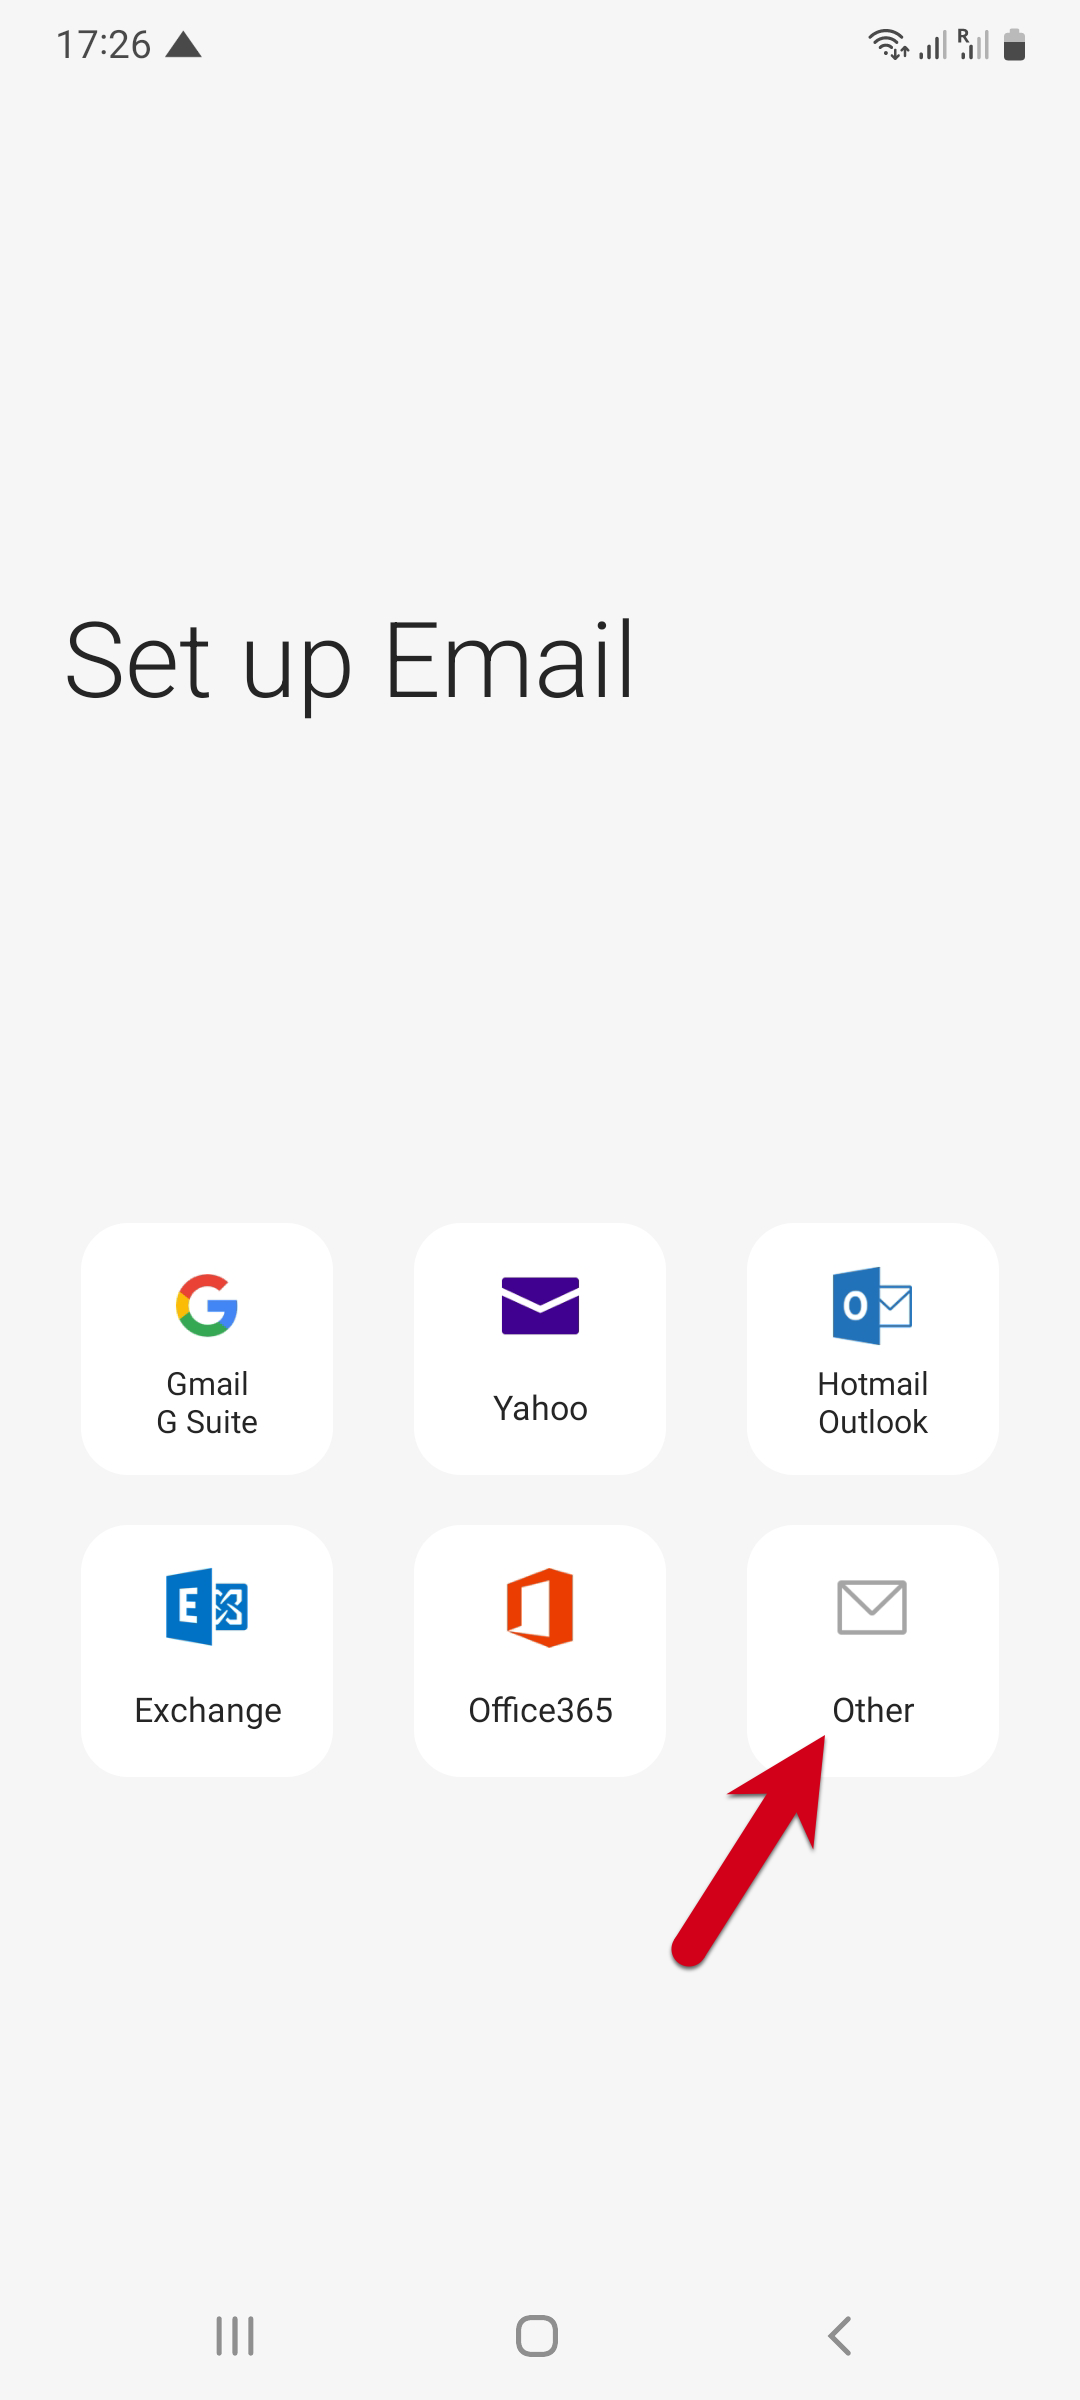
- Open the Email app
- Tap Other when prompted to Set up Email
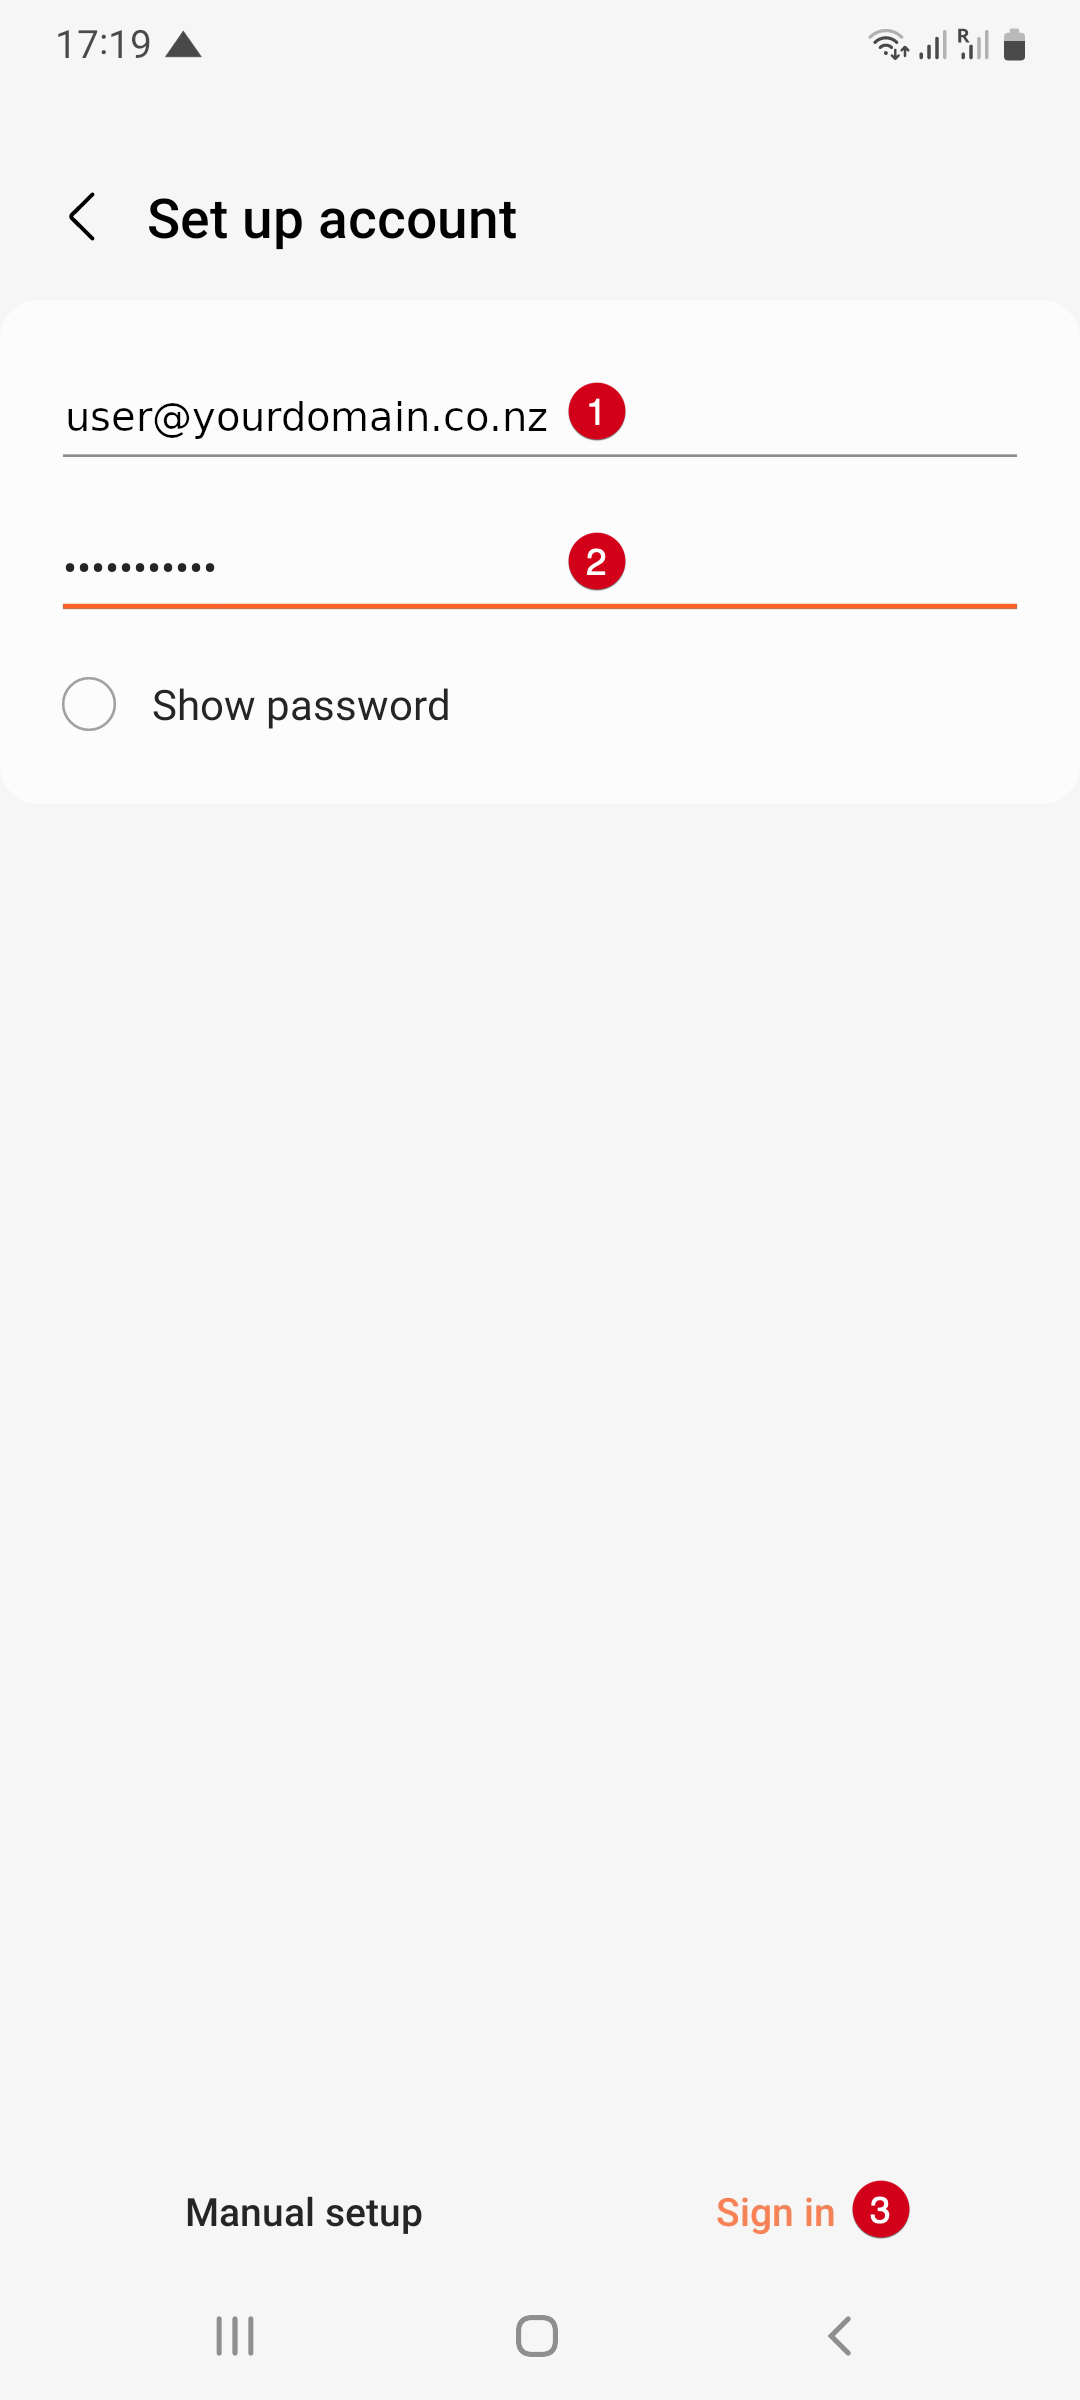
- Enter your details:
- Email Address: Email address
- Password: The password for your email address
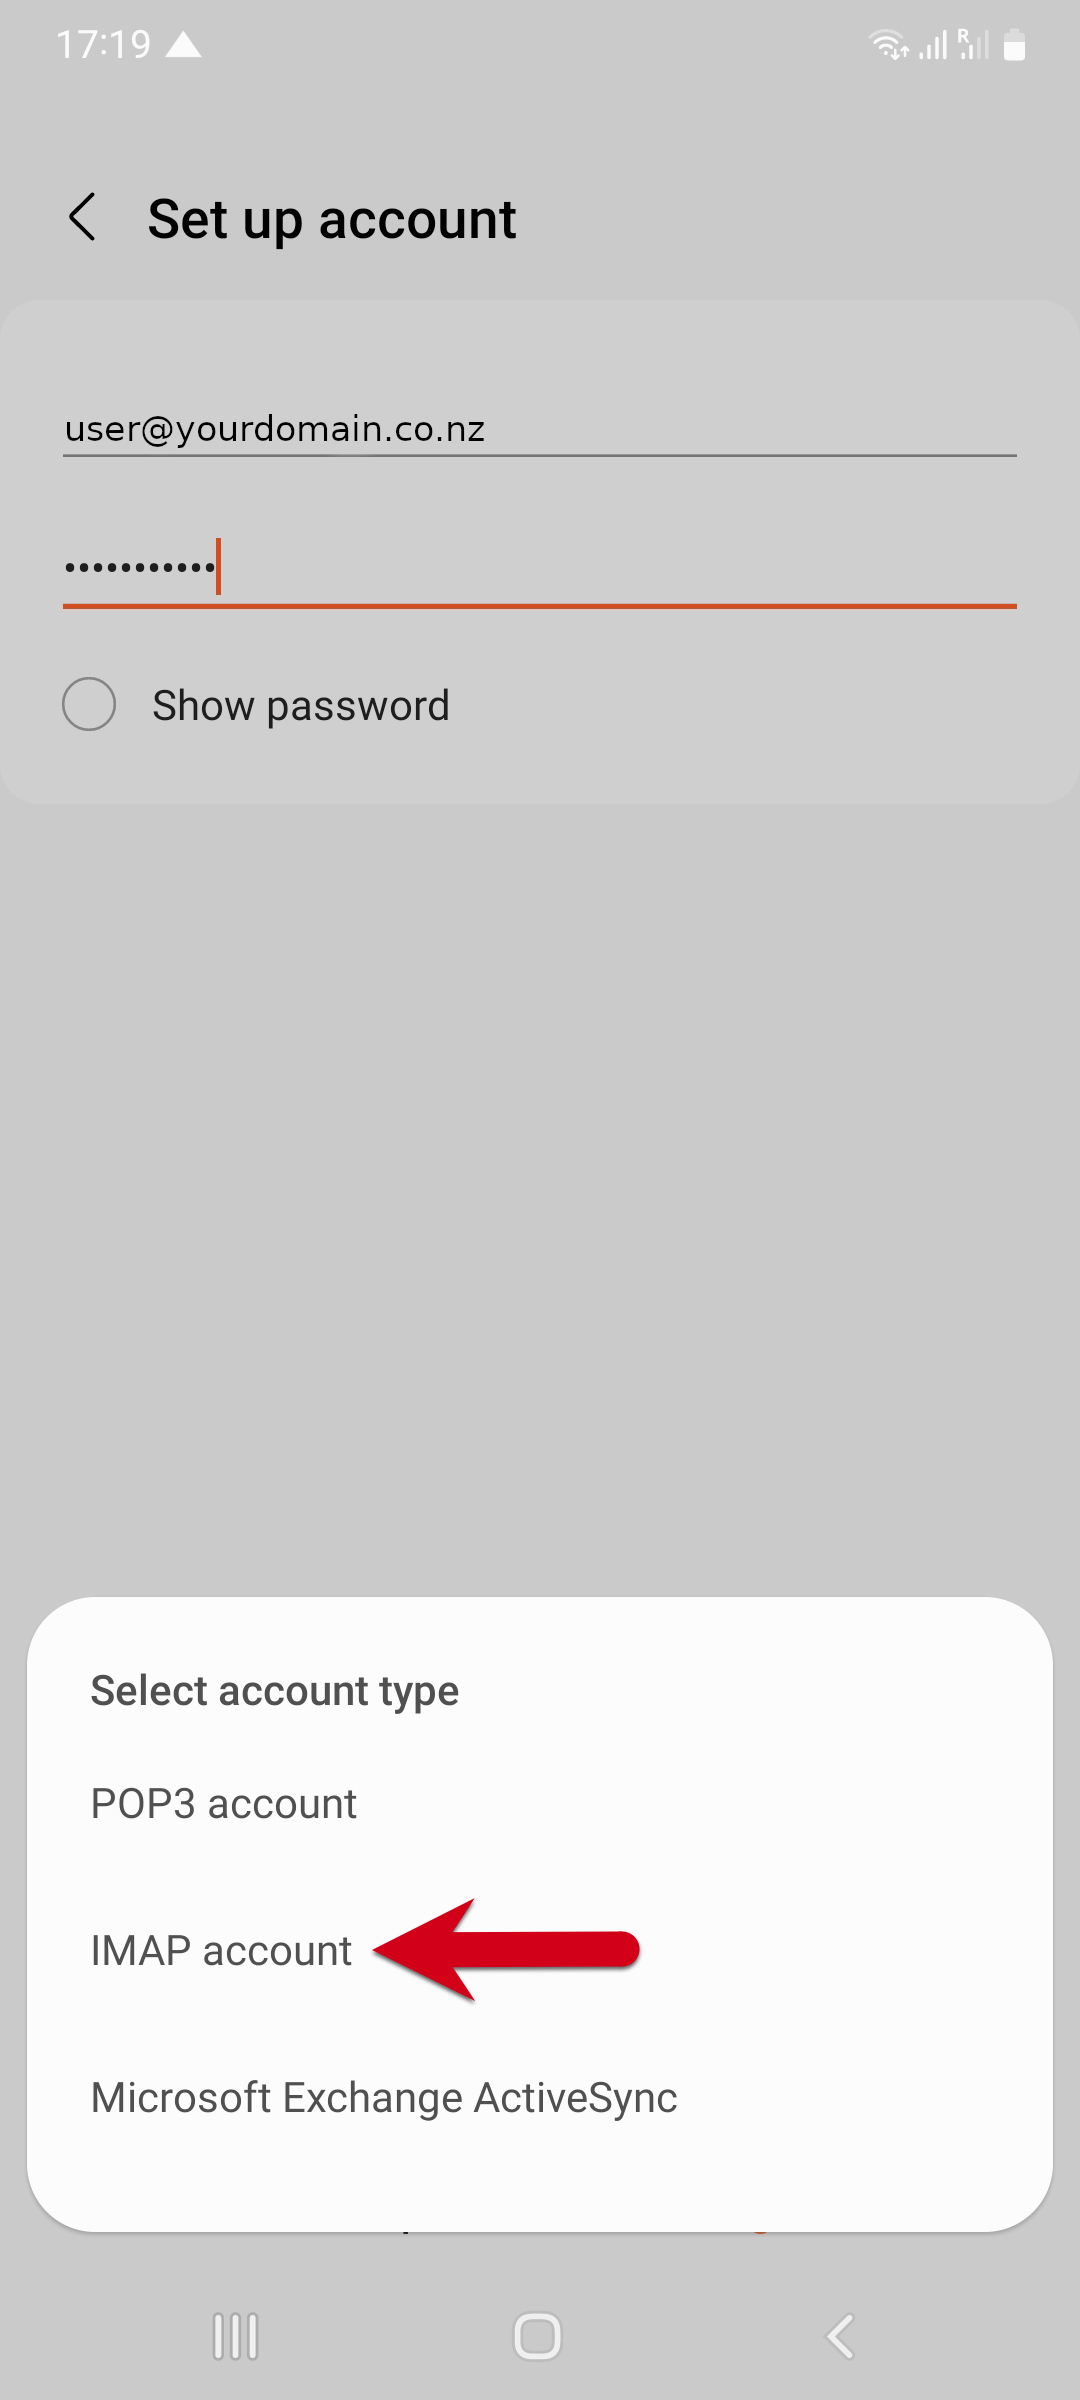
- Choose IMAP account as the account type
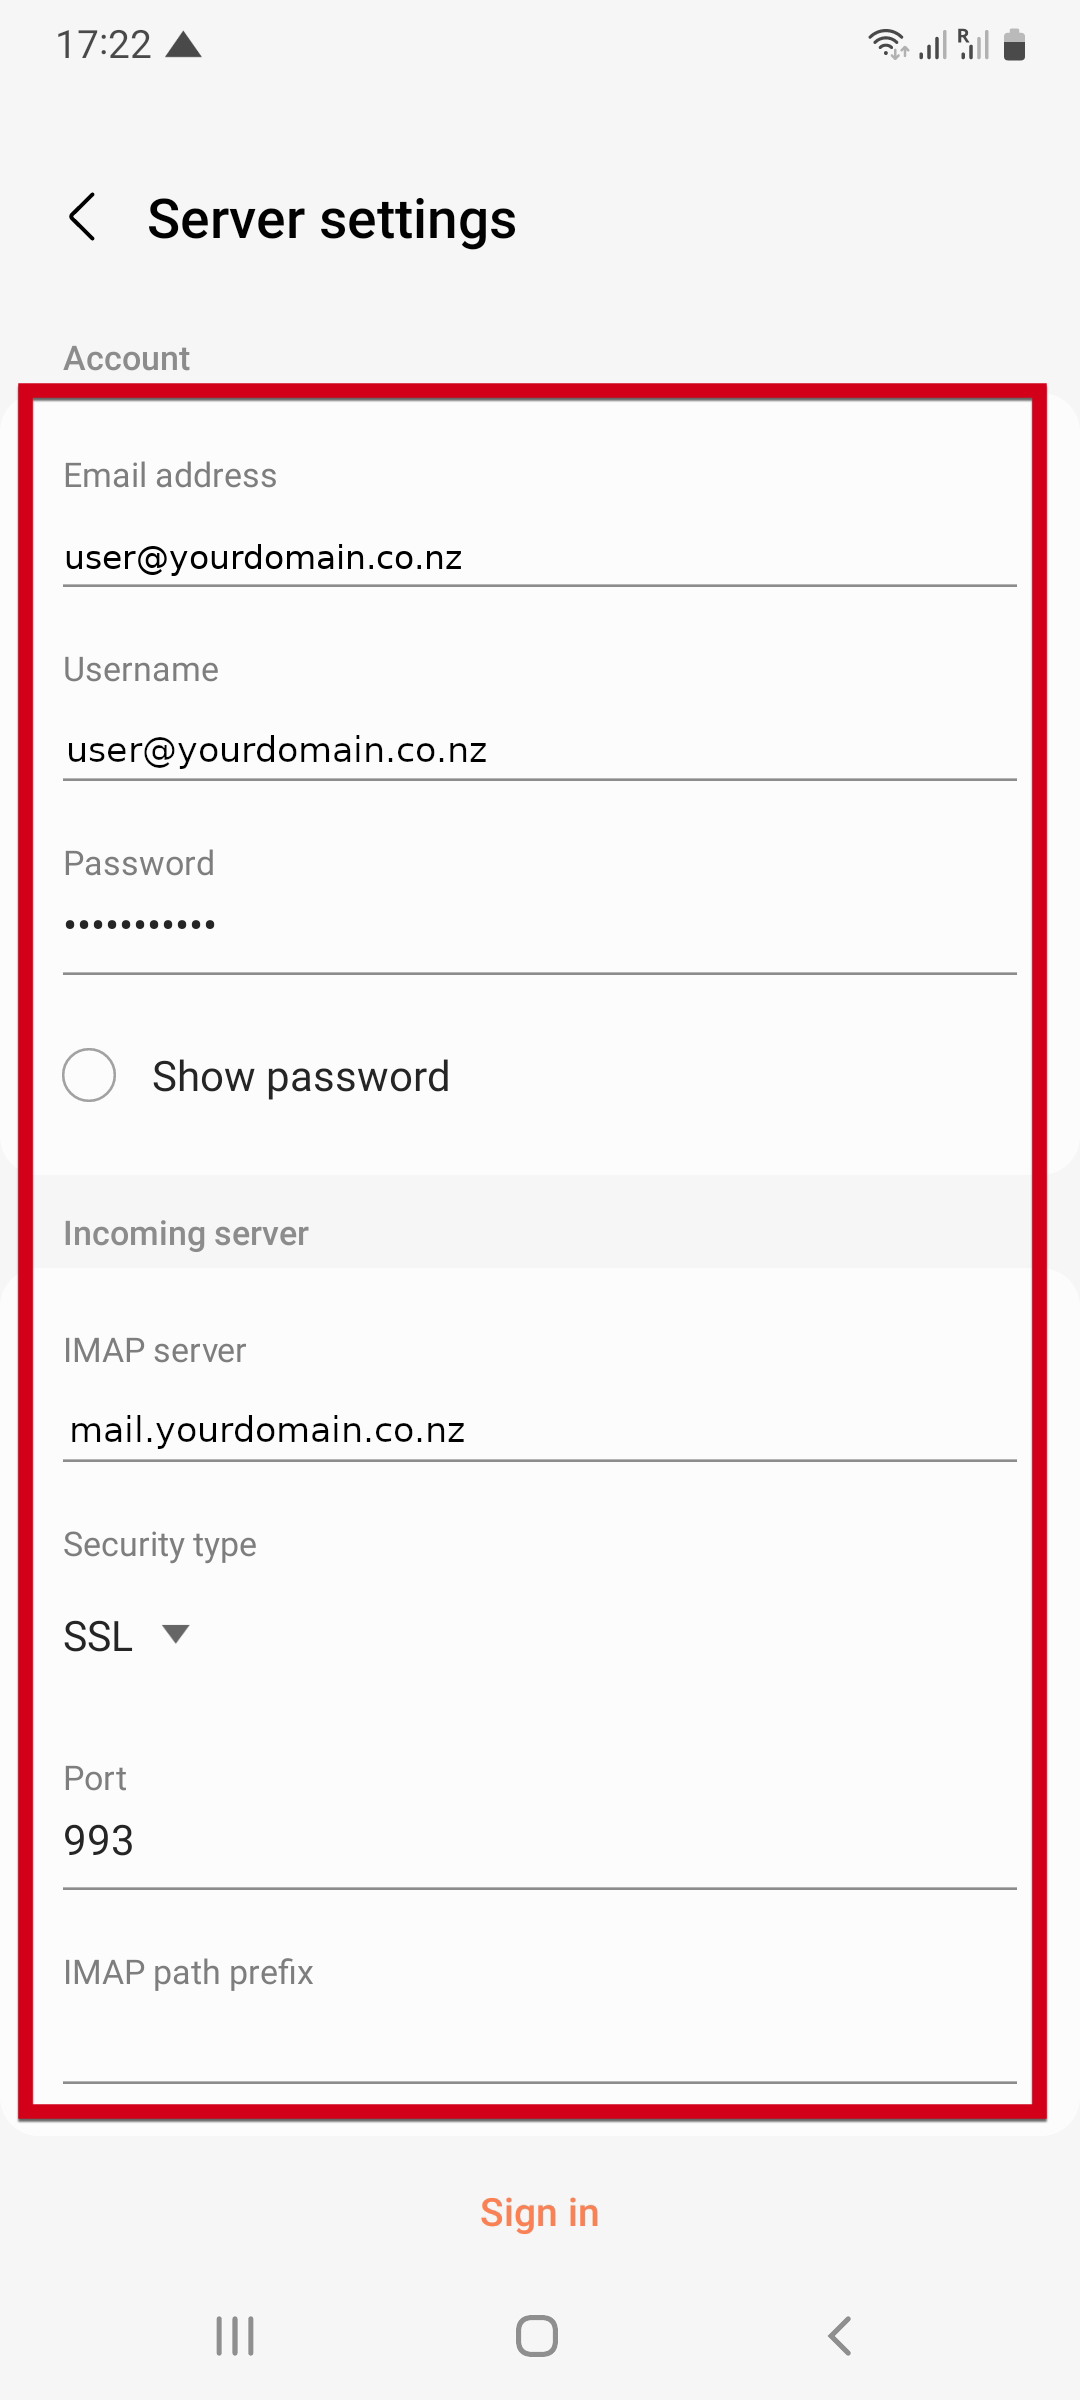
- Enter the details for the Incoming Server settings:
- Email Address: Your email address
- Username: Your email address
- Password: Password for your email address
- Incoming Server: `mail.yourdomain.co.nz`
- Security Type: SSL
- Port: 993
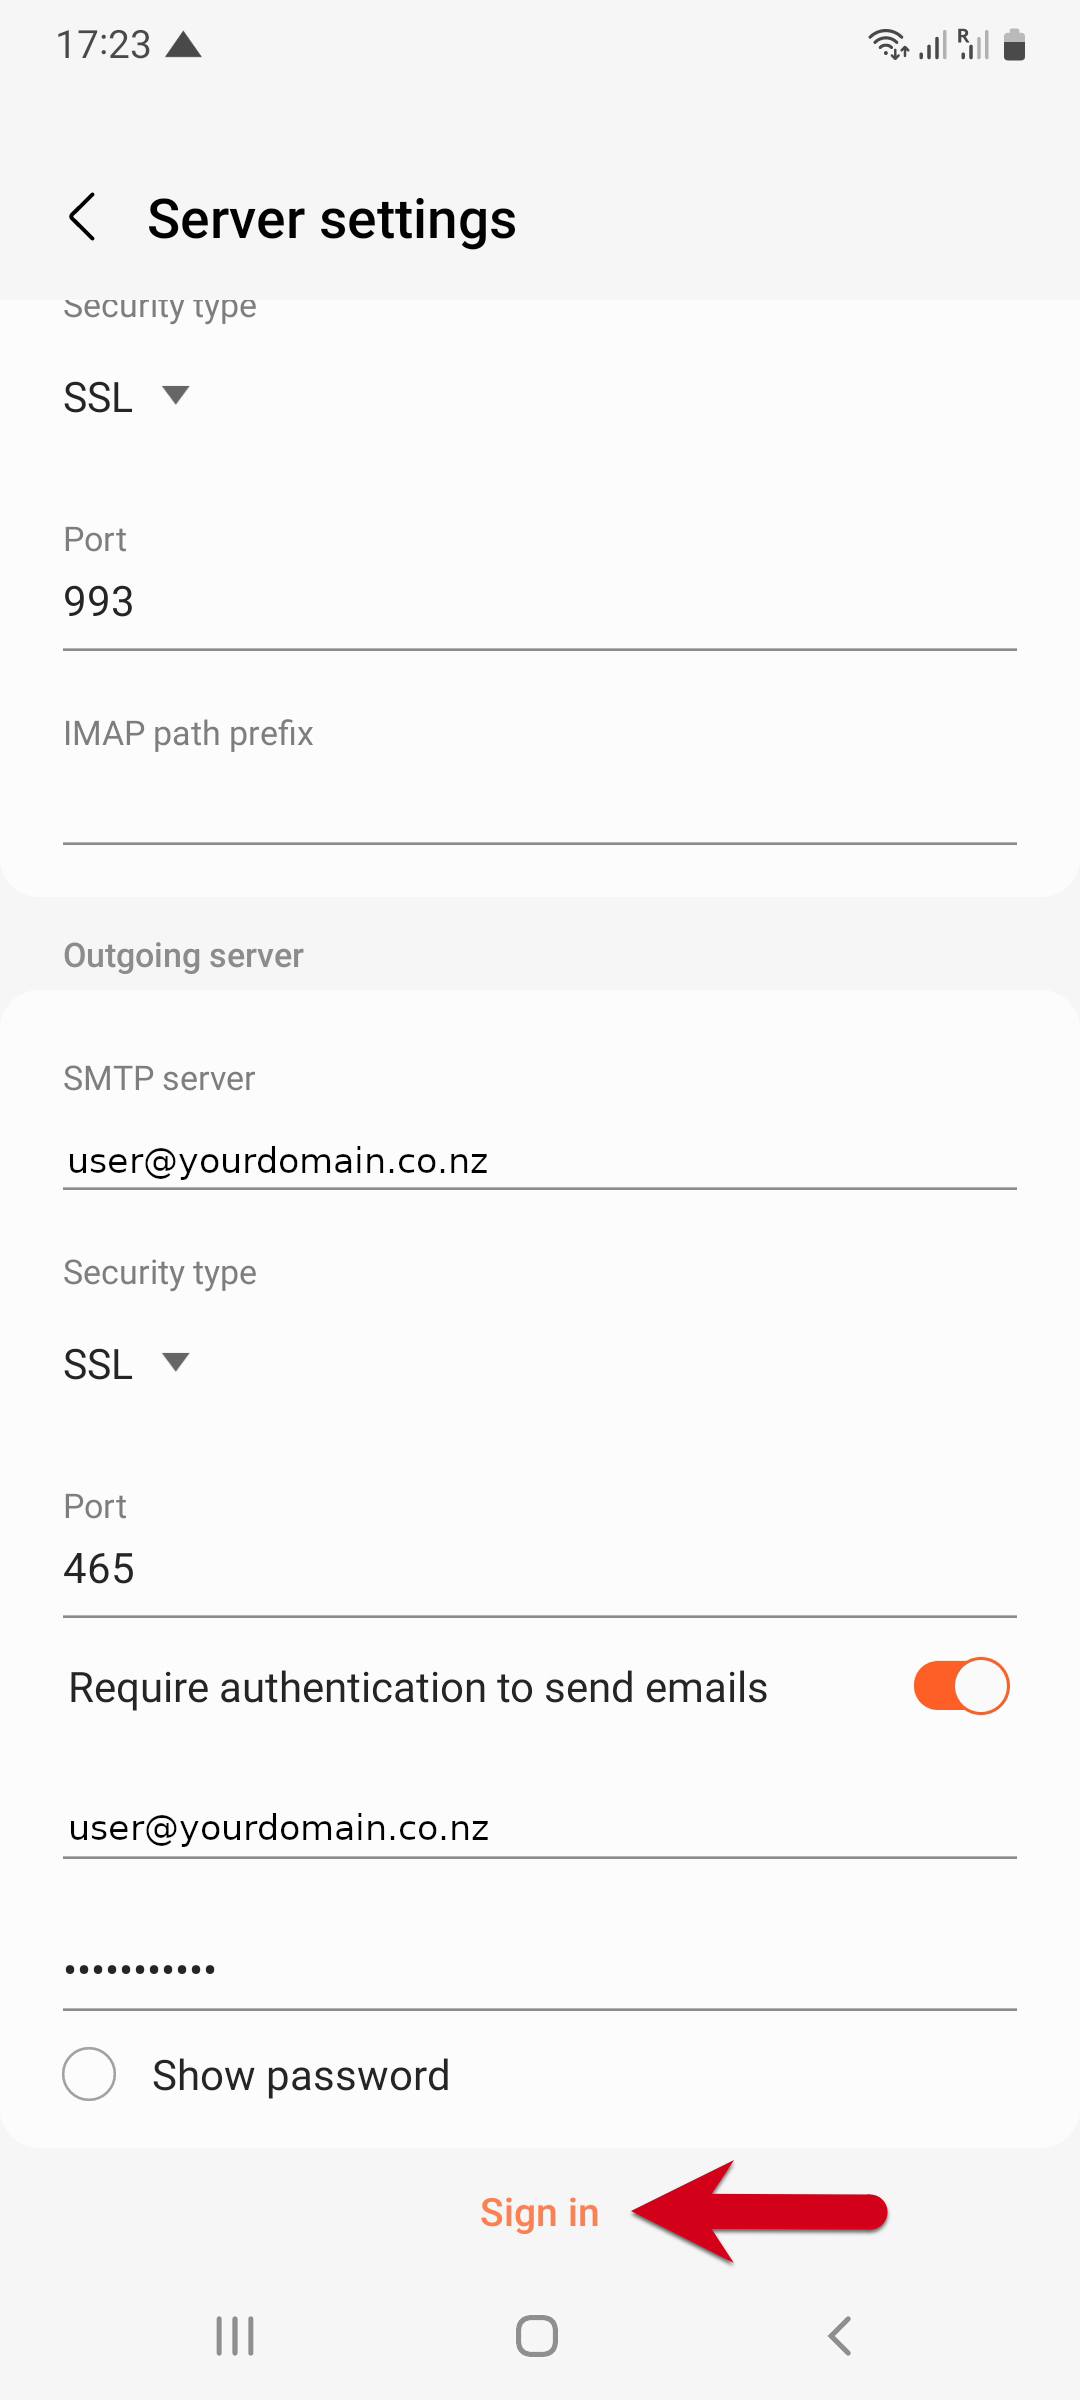
- Enter the details for the Outgoing Server settings:
- SMTP Server: `mail.yourdomain.co.nz`
- Security: SSL
- Port: 465
- Require authentication to send emails: Enabled
- Username: Email address
- Password: Password for your email address
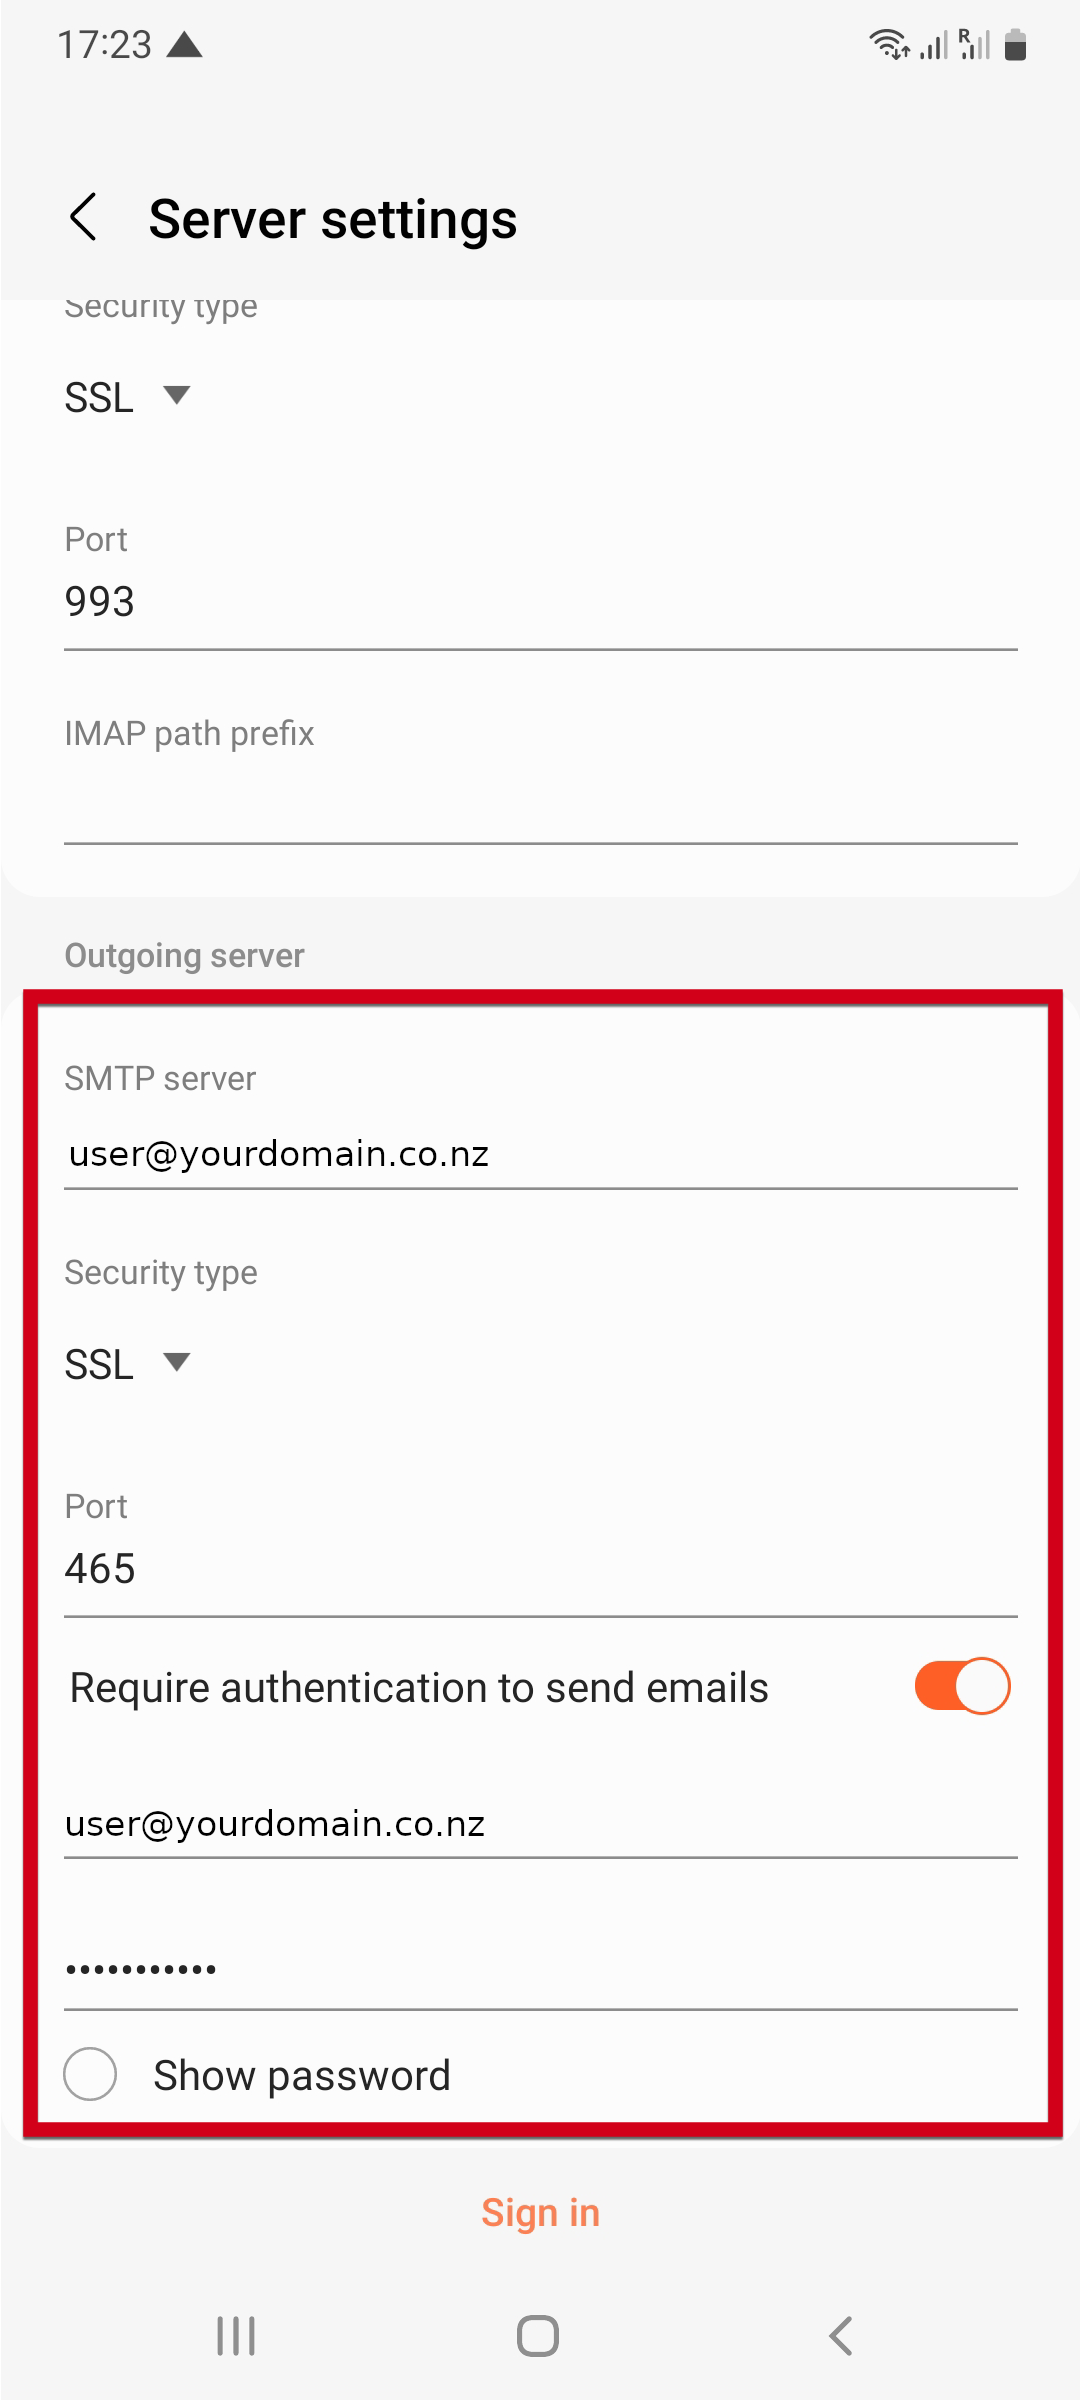
- Click Sign In